Gear Review: Scarpa Crux Approach Shoe

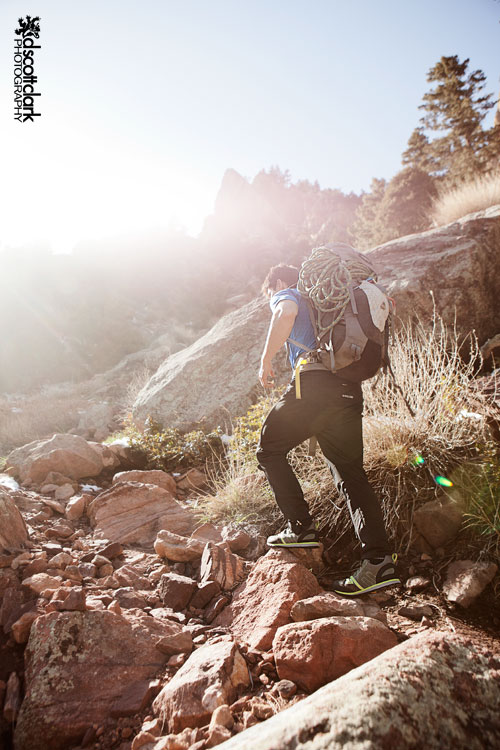
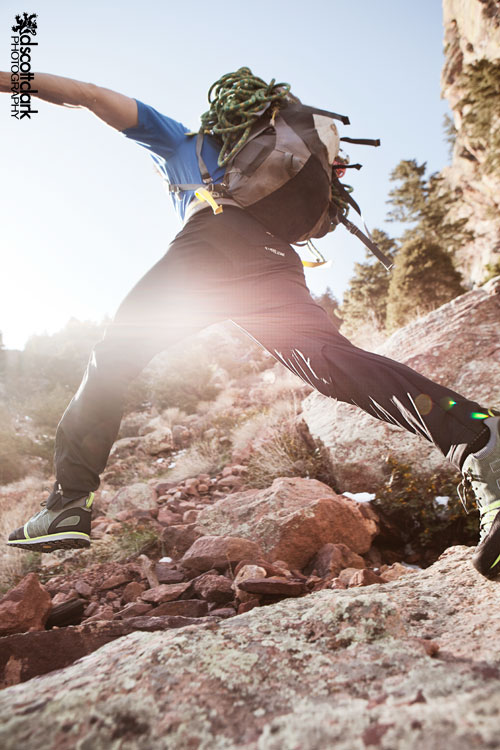
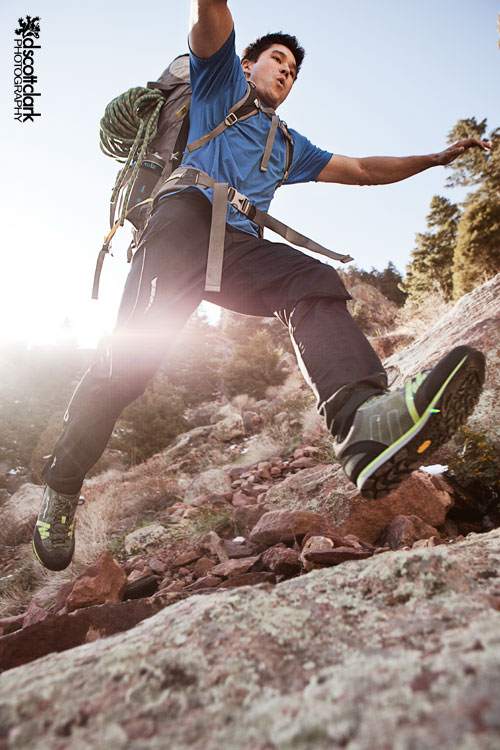
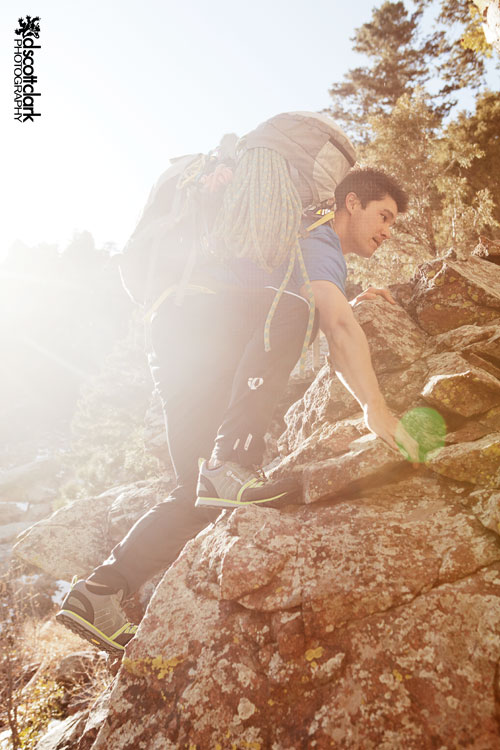
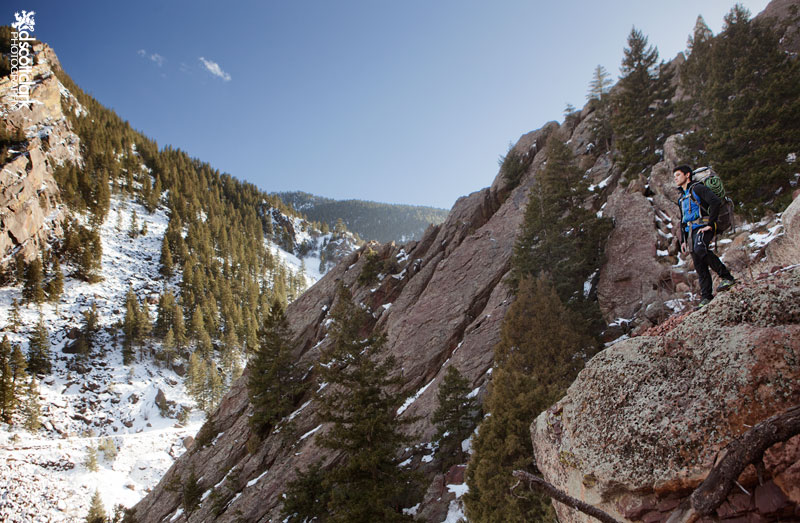
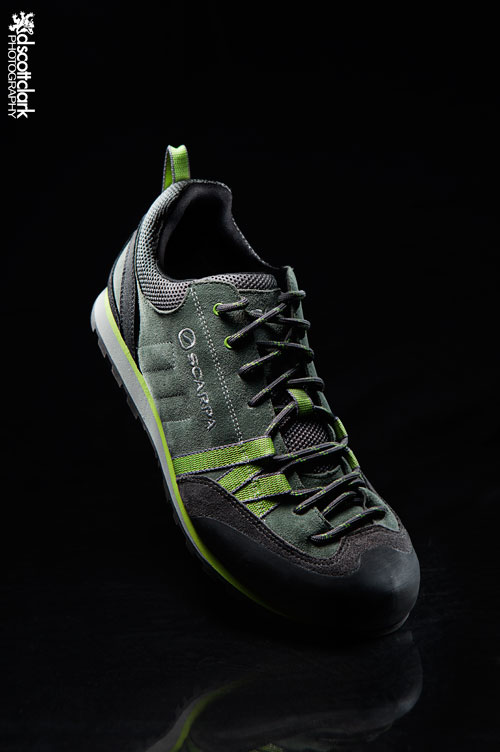
I originally got the Scarpa Crux Approach Shoe for a lifestyle photoshoot with JJ Yosh in Eldorado State Park last spring, but they’ve turned into my go-to approach shoes. 
The Crux is incredibly comfortable and quite hardy. I really got my first chance to put them to the test in Peru this summer. I climbed the almost 20,000 foot peak, Alpamayo, in July. The approach from the trailhead is nearly 20 miles including 9,000ft of elevation gain. The great majority of steps were taken in these shoes, and I hardly noticed them (hardly a bad thing) until I put on my 6000m mountaineering boots. Then, I just wanted to have the Crux’s back on my feet. 
The footbed is comfortable the toe box is wide enough that my feet don’t feel squished at all (a problem I have with a lot of approach shoes). The laces, especially at the front of the shoe, allow a lot of control over the fit because of Kevlar reinforced webbing. The rubber is sticky and I feel secure on most rocks I smear up on the approach. Climbing 5.8 slab in them is slightly unnerving, but I didn’t slip once.
Coming off of Alpamayo I couldn’t wait to put on the Crux’s and for the hurried hike out, covering the 20 miles from the glacier camp back to the trail head in half a day, my feet only hurt because of my mountain boots.  Even after all of that wear these are still the approach shoe I grab when heading out the door, and after eight months of heavy use they are still holding together (in comparison to a lot of approach shoes I see that really fall apart). 
Check out some more of the shots from the lifestyle shoot with JJ. 

Product Photography: Multi-light Look with Only One Light

When I get new gear for whatever reason I want to shoot it before I dirty it up. I recently got some shoes from Scarpa for a spec shoot and some shoes from Adidas Terrex. Before destroying them I set up my home studio and went to work.

I started off with the Scarpa Crux approach shoe. It’s a sturdy shoe with good Vibram rubber. It is quite comfortable, but I haven’t taken it out on any long approaches yet.

Using a piece of glass under your subject adds a bit of interest to a product photo, but as with anything, don’t over do it. In this case I used a piece of glass from a broken 16×20 frame. Taping the edges helps it not cut things and you, and I think makes it a bit sturdier. 

I employed a method of lighting using only one light but giving off the appearance of a complex multi-light setup. Put your camera on a STURDY tripod and use and cable release so you do not bump your camera during the process. For this to work you camera has to stay completely still.

I use a LumiQuest SoftbBox LTp with my Speedlite 580EXII on a wireless slave as my one light. It’s 10″x14″, giving you over 40x the surface area of a Speedlite. Interpretation: it gives you much softer light. With the Speedlite on a wireless slave I can move around my subject freely without bumping the camera position. I take multiple shots with the light in every possible different position.

Next step: Photoshop! In Photoshop open all the different versions of the image that you think you’ll use. Pick one to be the base image then drag all the other photos on to your chosen “base”. Holding Command + Shift while doing this will align all of your images. Create inverted layer masks on all but the base layer and begin “painting” in the light that you want. Presto: Magical Multi-Light image.