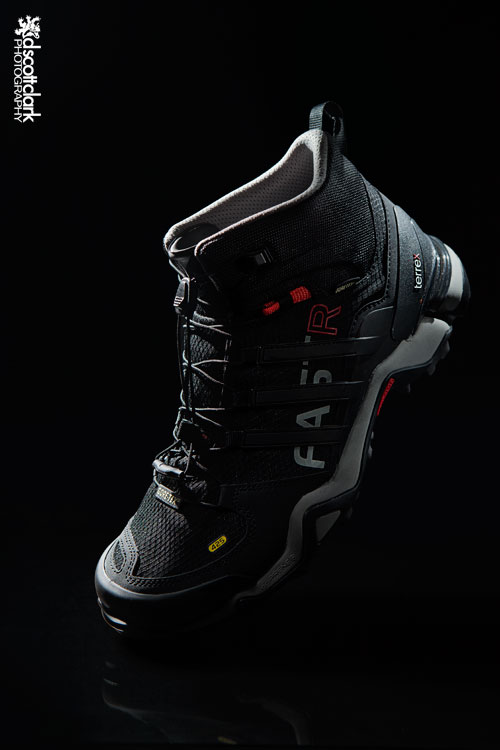
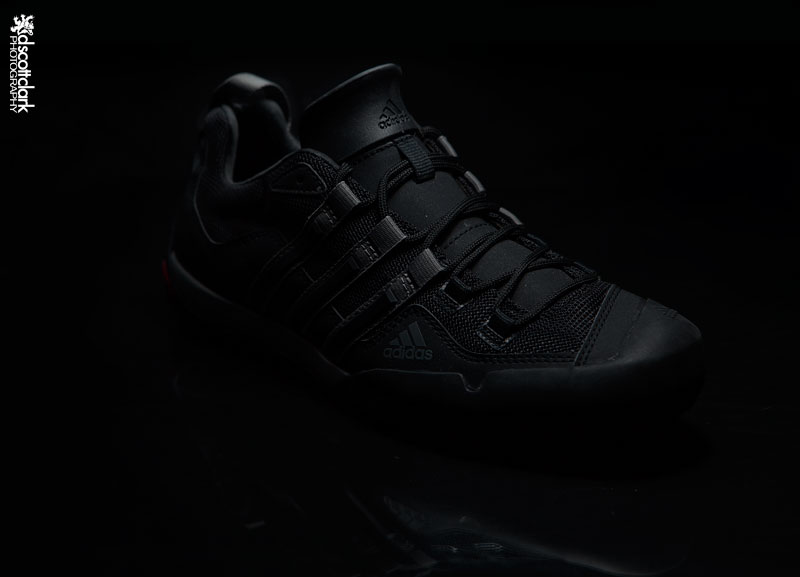
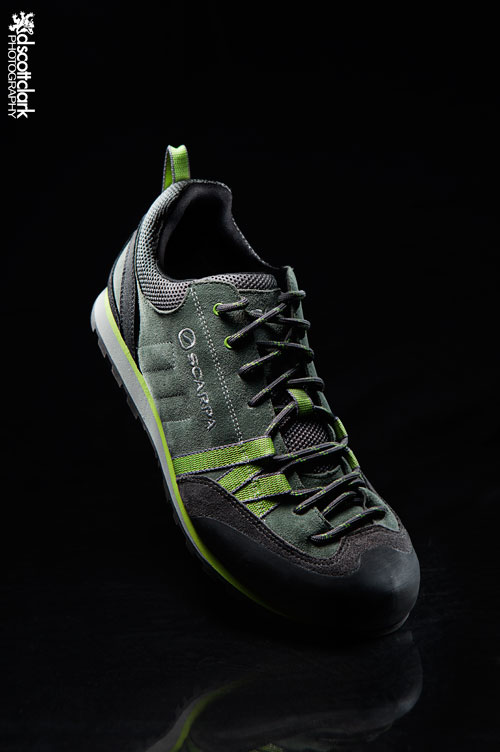
When I get new gear for whatever reason I want to shoot it before I dirty it up. I recently got some shoes from Scarpa for a spec shoot and some shoes from Adidas Terrex. Before destroying them I set up my home studio and went to work.
I started off with the Scarpa Crux approach shoe. It’s a sturdy shoe with good Vibram rubber. It is quite comfortable, but I haven’t taken it out on any long approaches yet.
Using a piece of glass under your subject adds a bit of interest to a product photo, but as with anything, don’t over do it. In this case I used a piece of glass from a broken 16×20 frame. Taping the edges helps it not cut things and you, and I think makes it a bit sturdier.
I employed a method of lighting using only one light but giving off the appearance of a complex multi-light setup. Put your camera on a STURDY tripod and use and cable release so you do not bump your camera during the process. For this to work you camera has to stay completely still.
I use a LumiQuest SoftbBox LTp with my Speedlite 580EXII on a wireless slave as my one light. It’s 10″x14″, giving you over 40x the surface area of a Speedlite. Interpretation: it gives you much softer light. With the Speedlite on a wireless slave I can move around my subject freely without bumping the camera position. I take multiple shots with the light in every possible different position.
Next step: Photoshop! In Photoshop open all the different versions of the image that you think you’ll use. Pick one to be the base image then drag all the other photos on to your chosen “base”. Holding Command + Shift while doing this will align all of your images. Create inverted layer masks on all but the base layer and begin “painting” in the light that you want. Presto: Magical Multi-Light image.