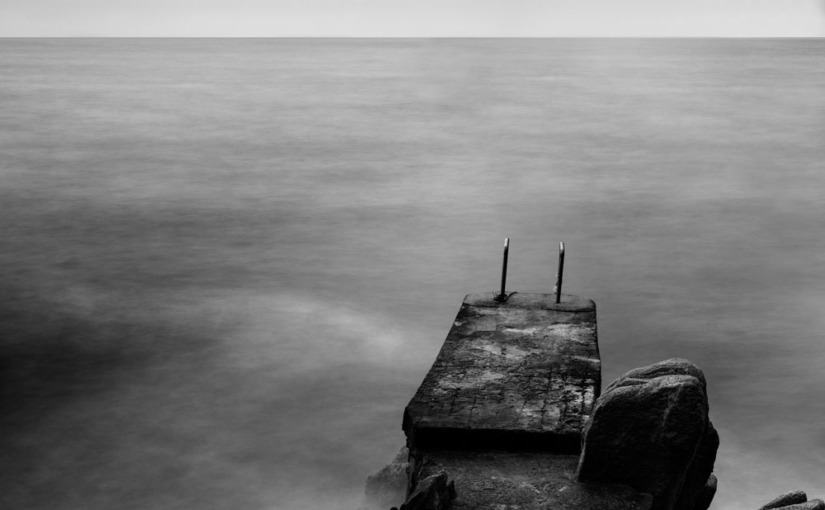
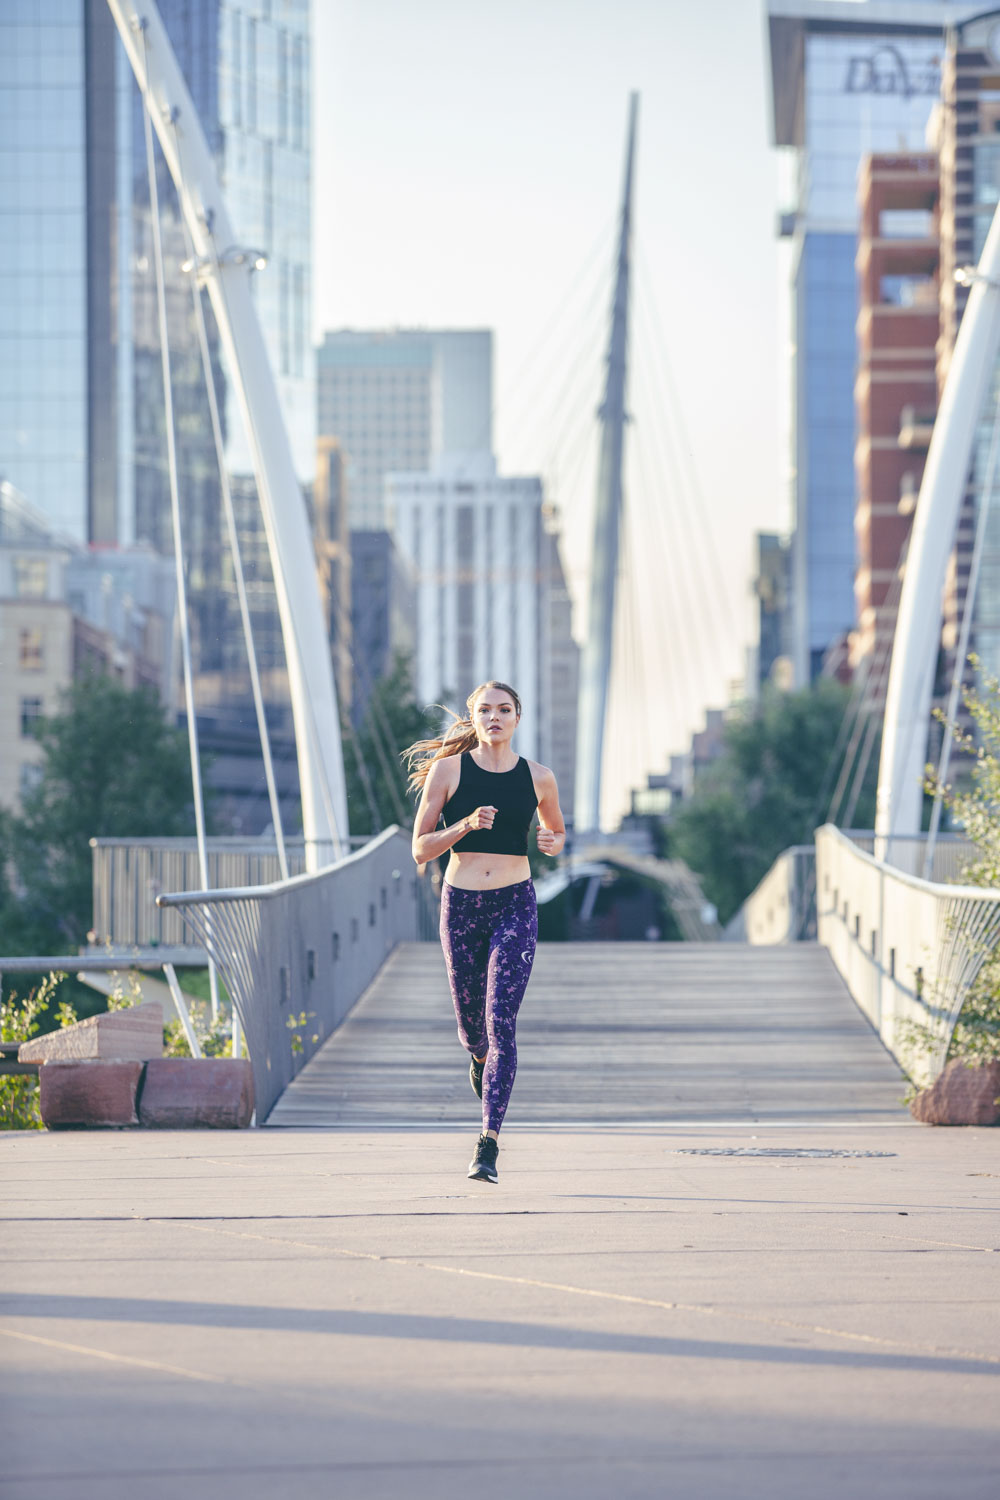
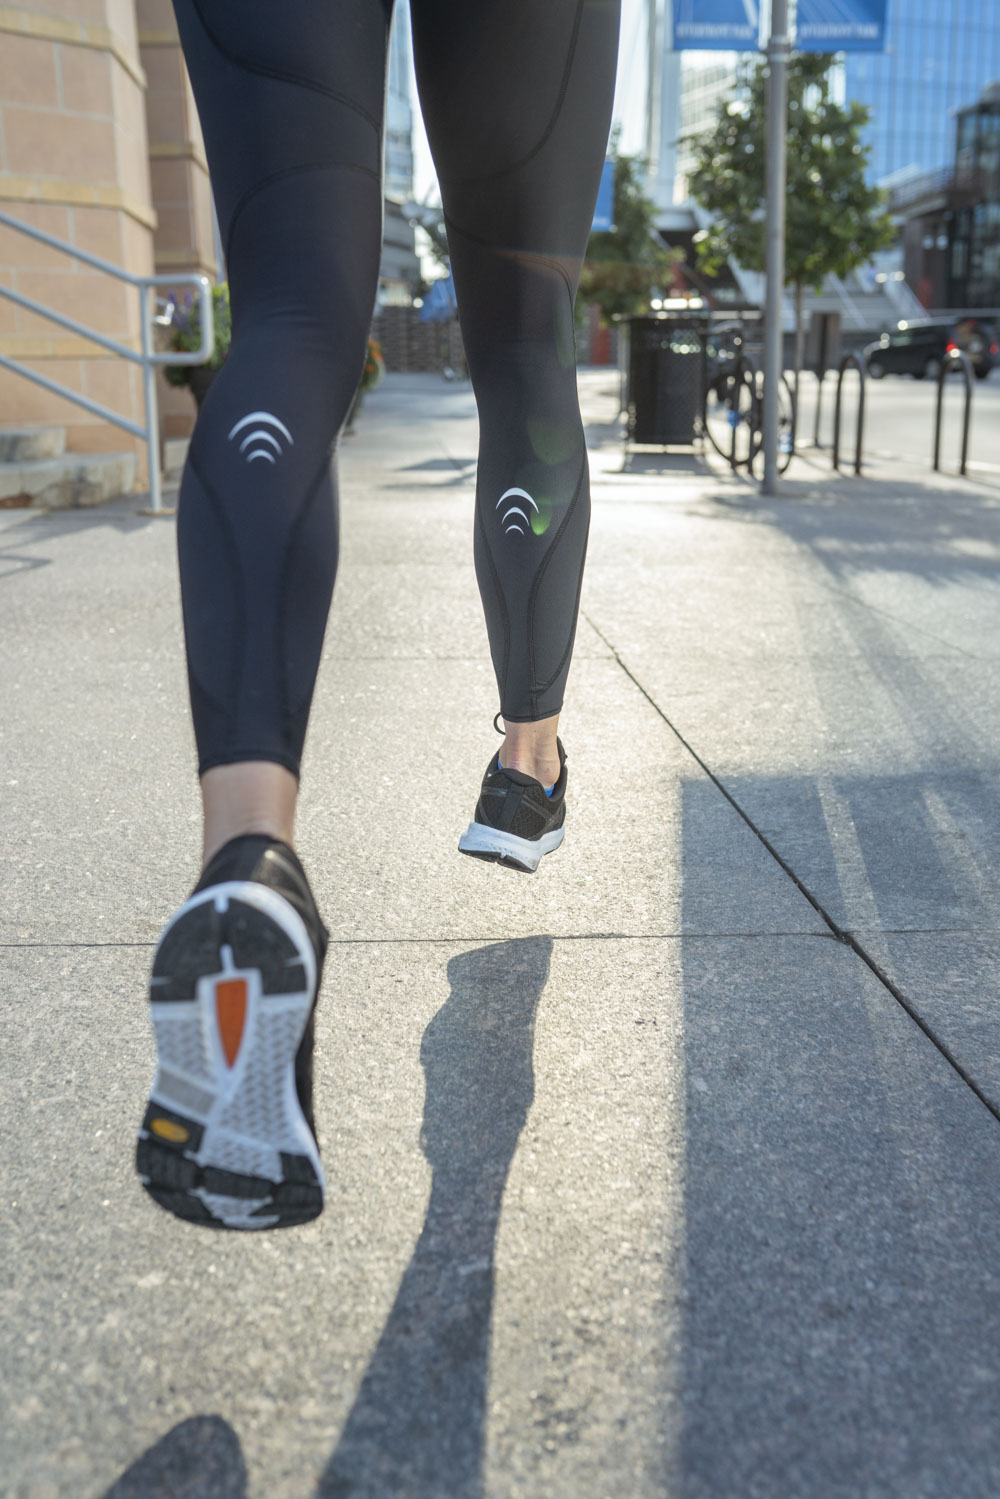
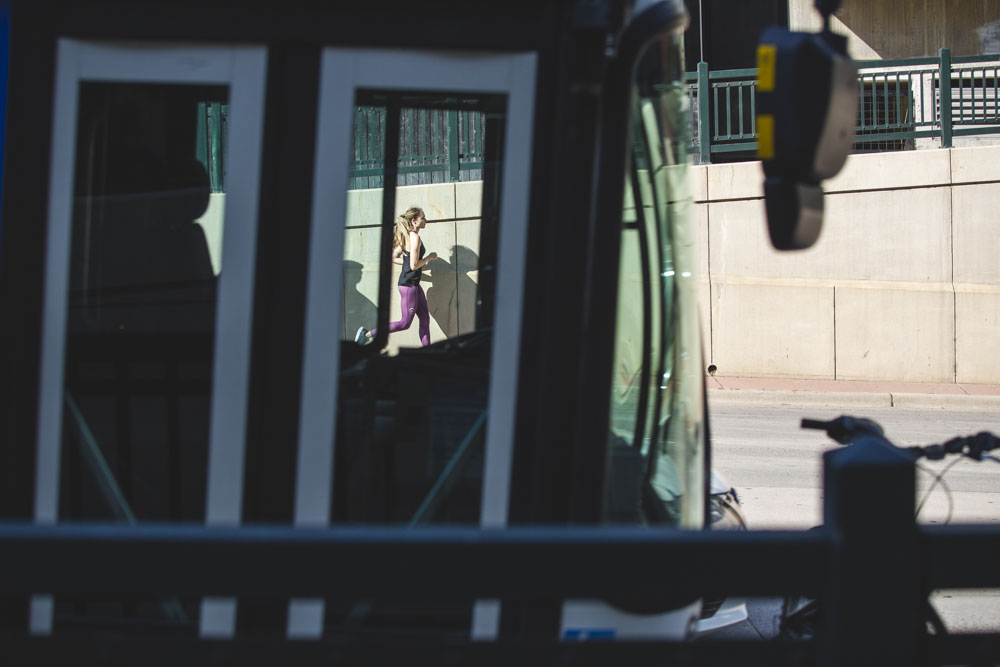
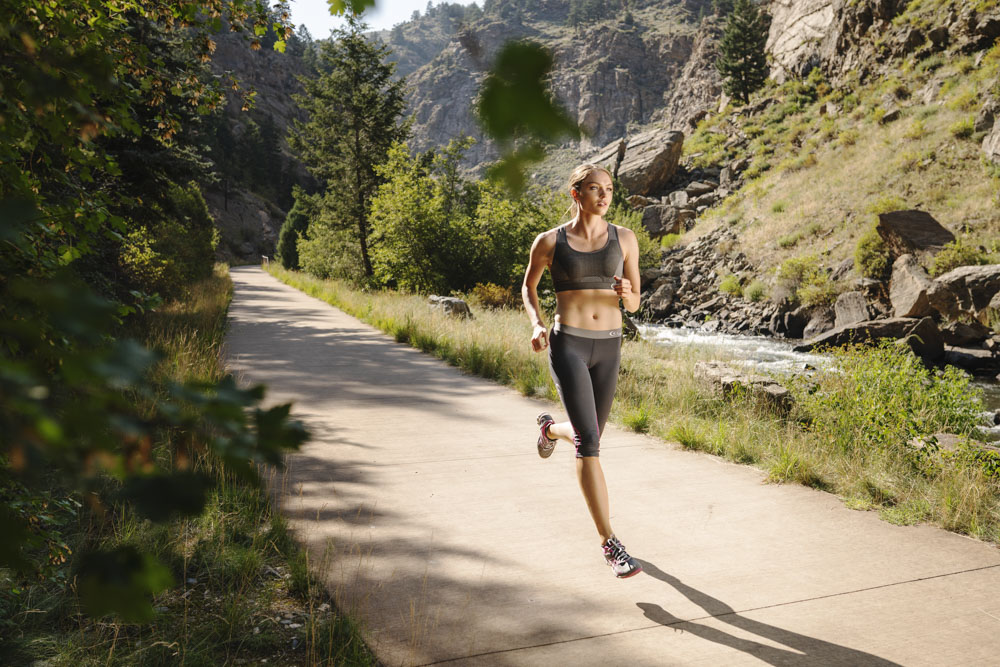
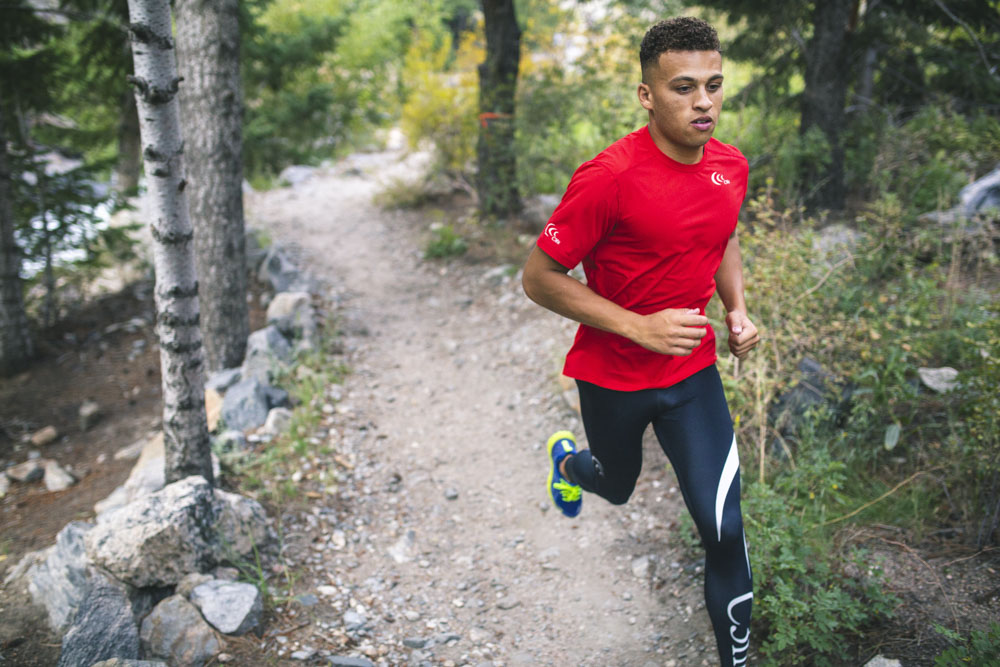
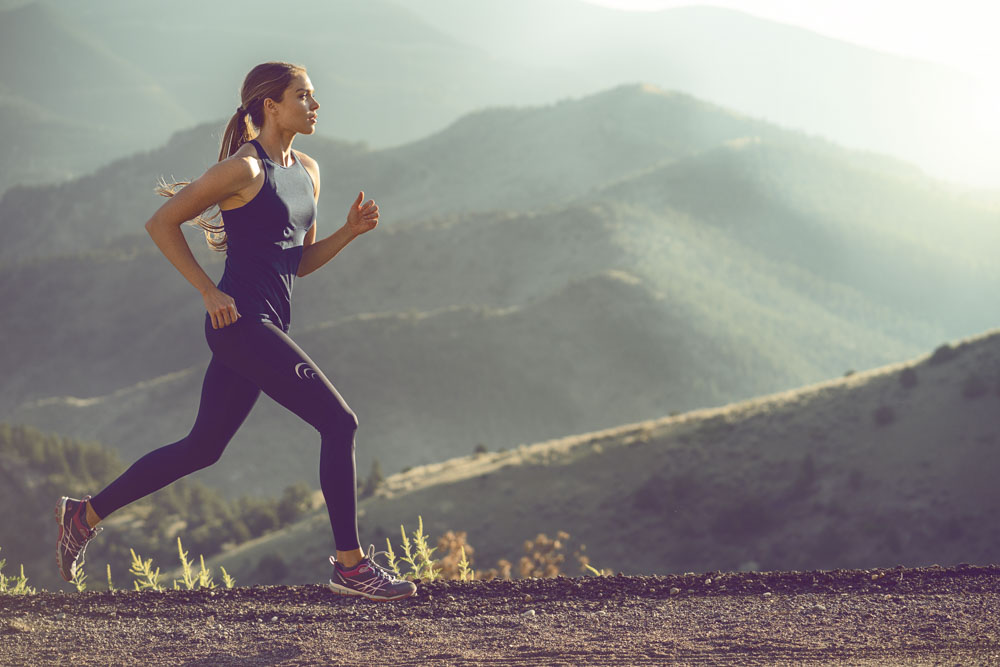
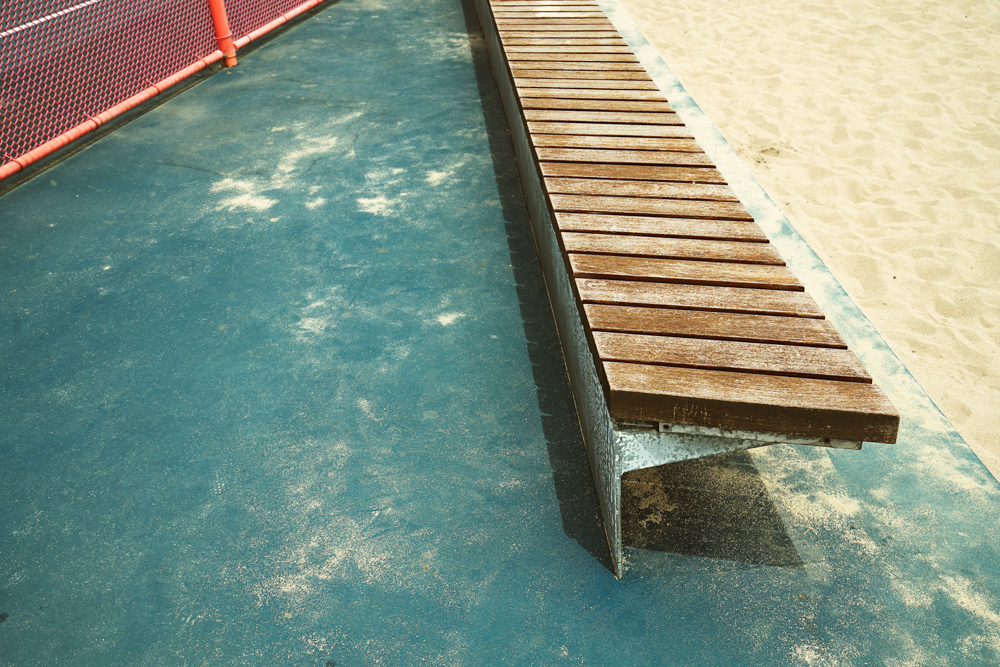
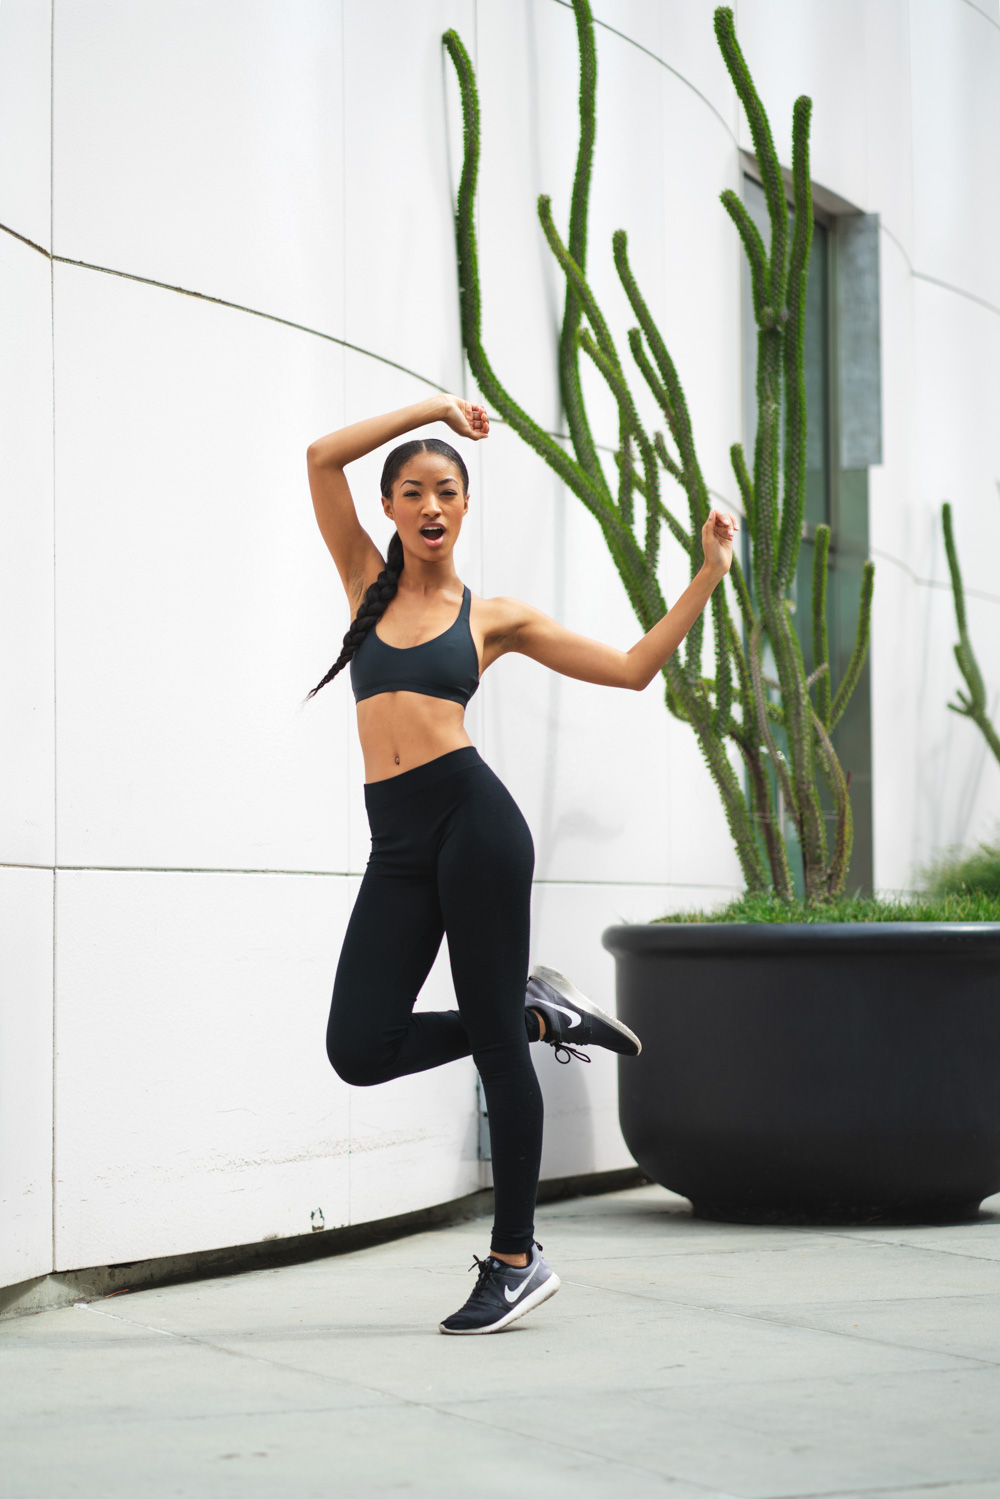
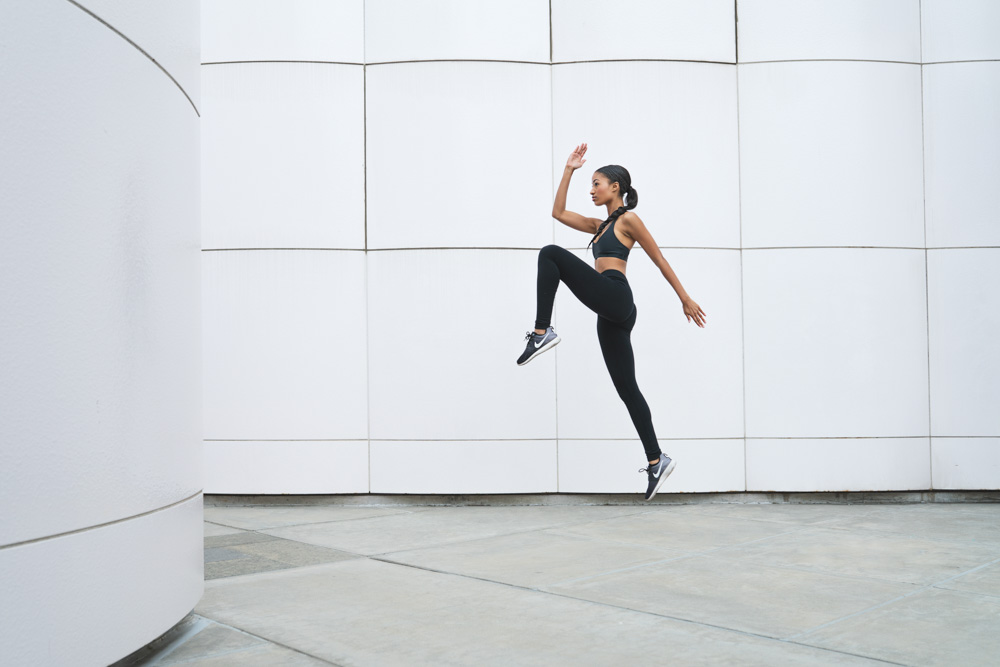
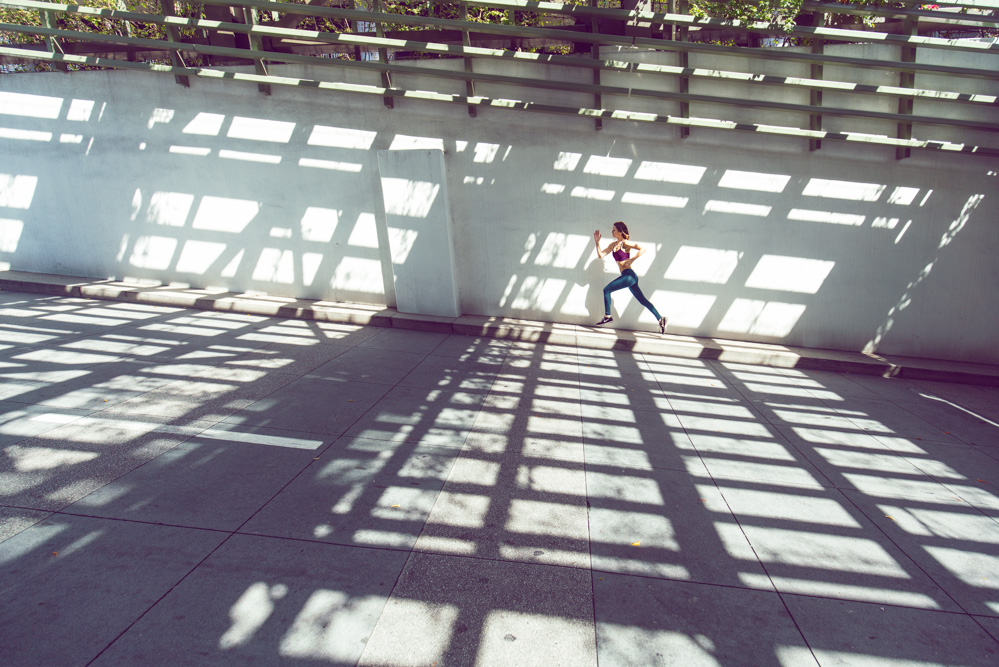
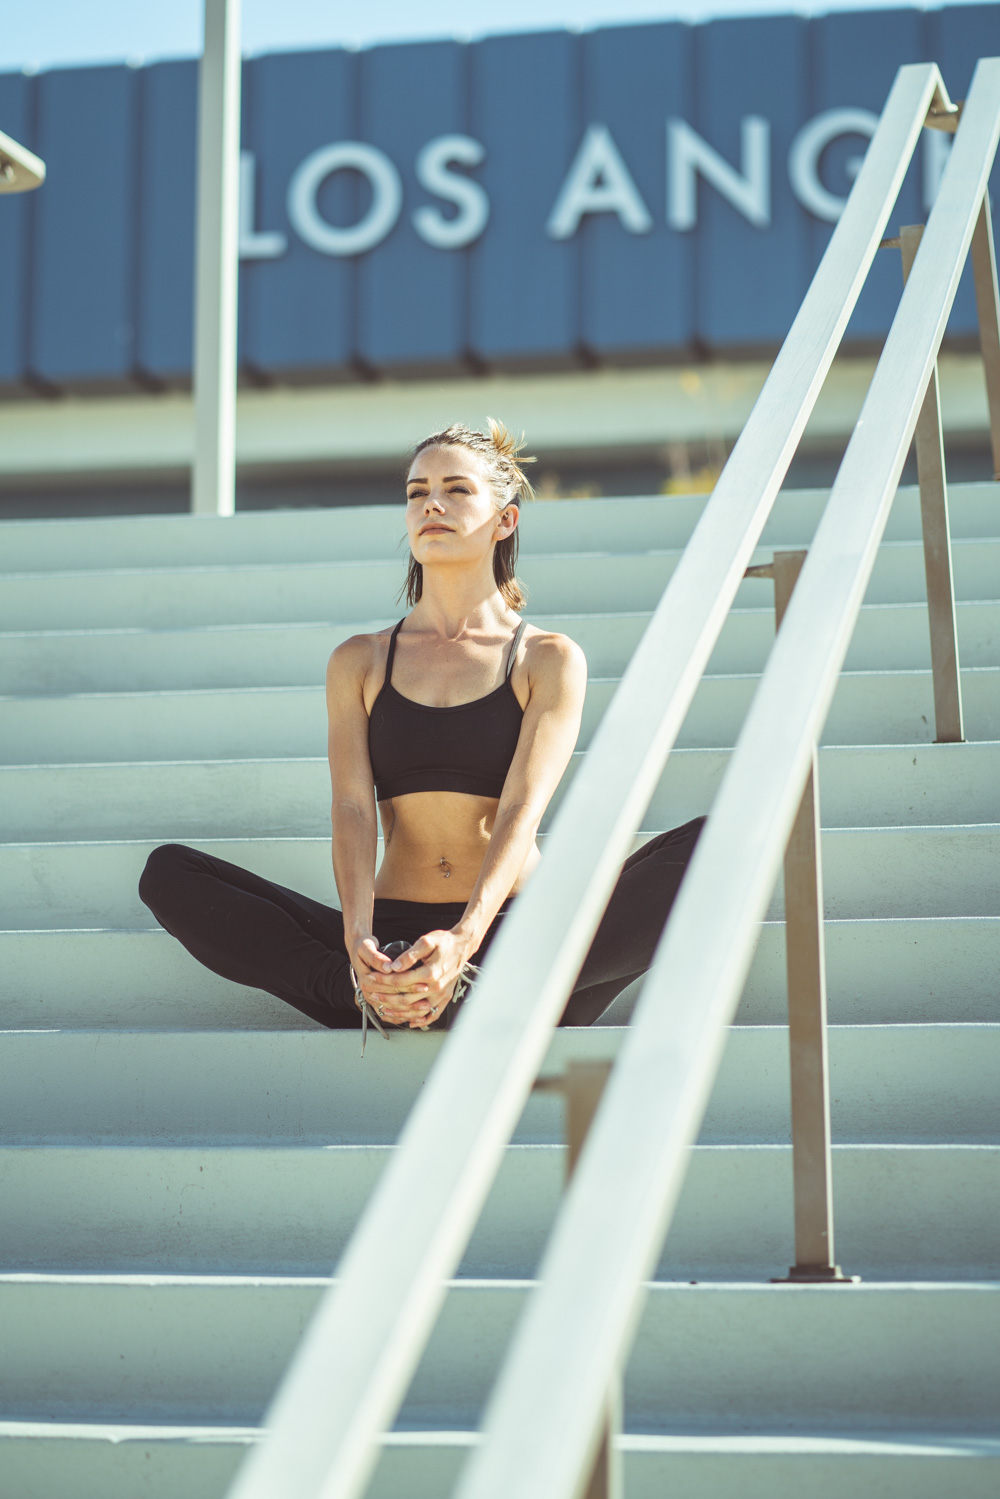
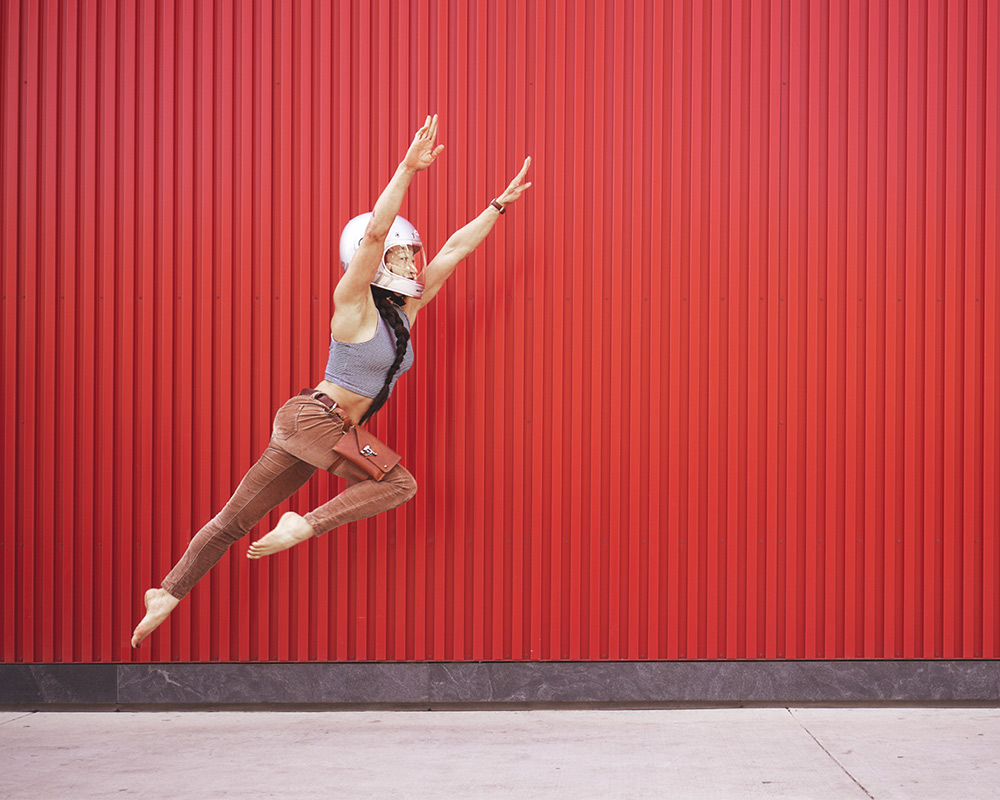
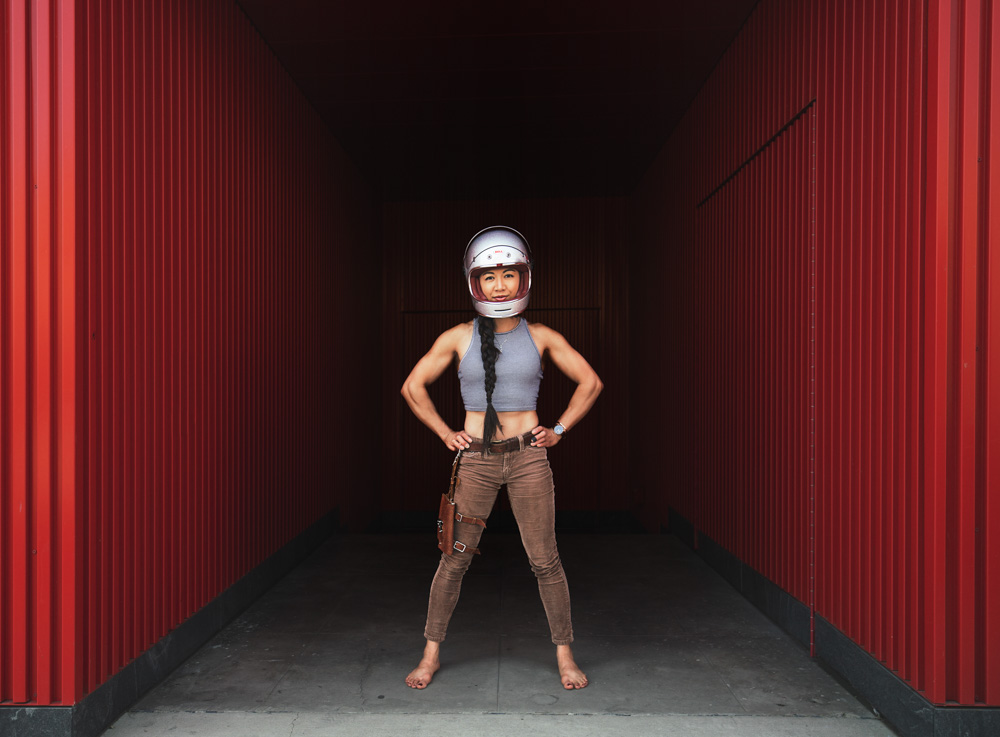
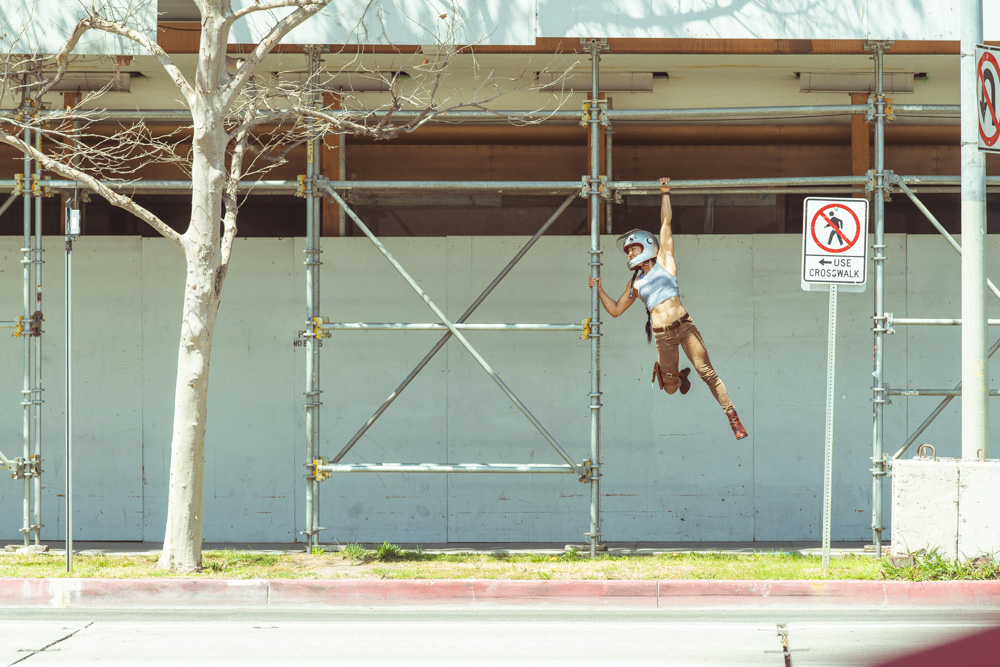
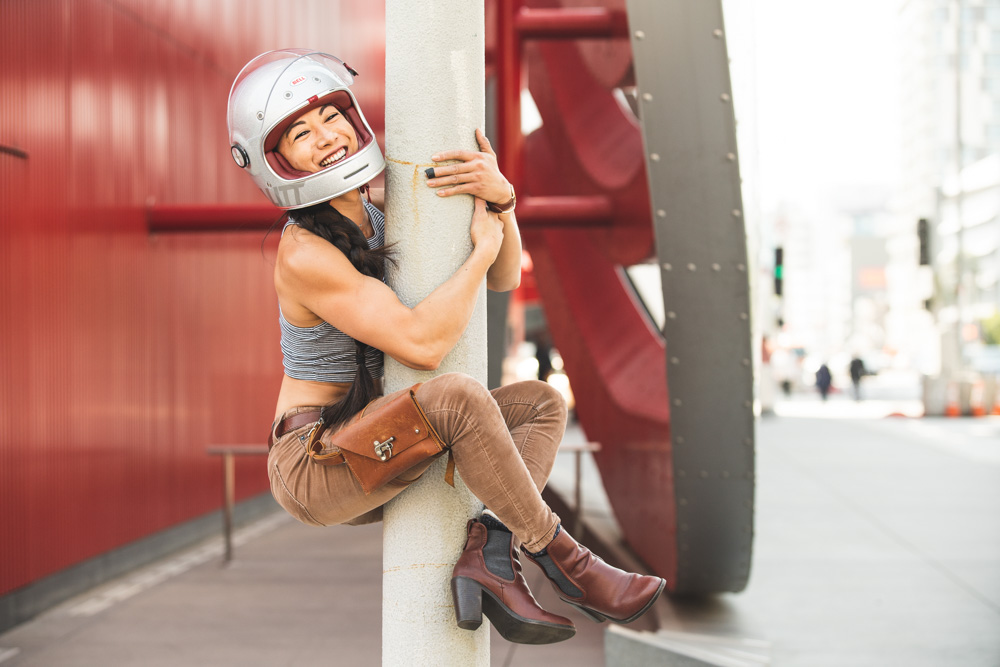
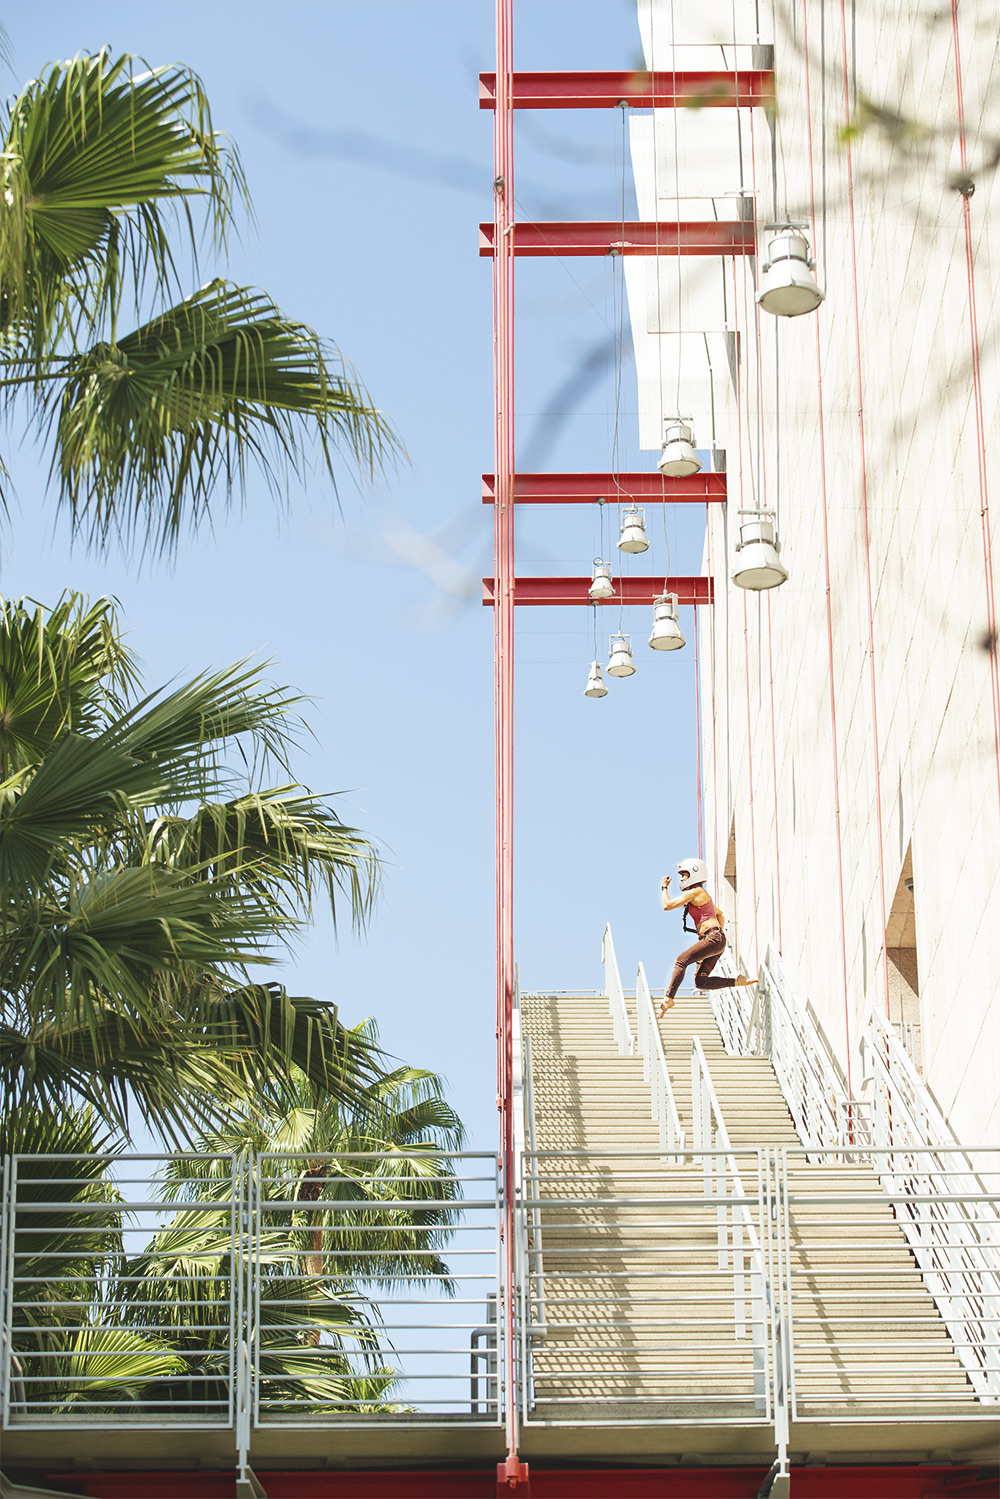
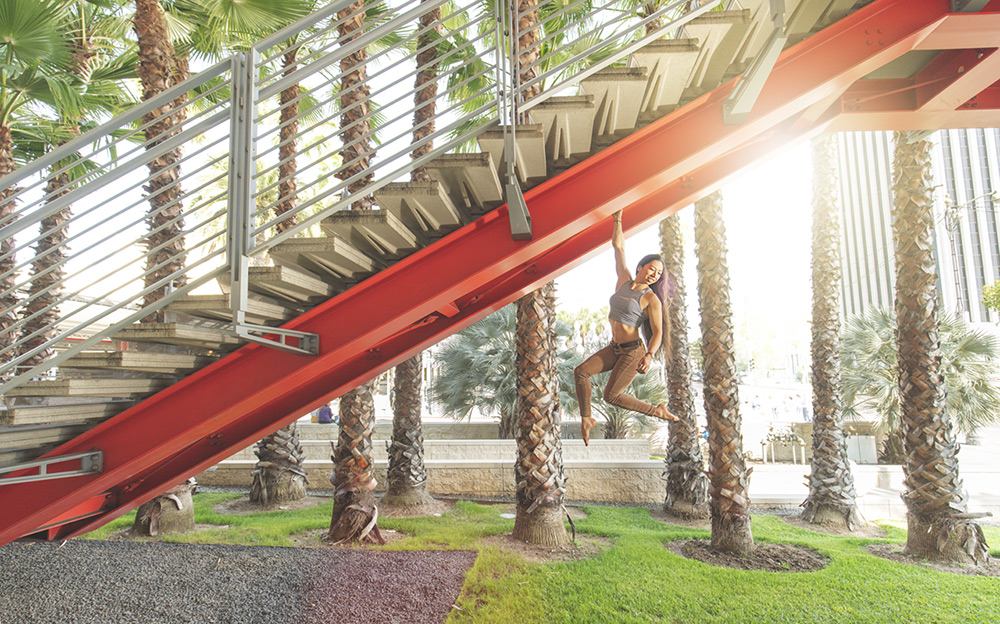
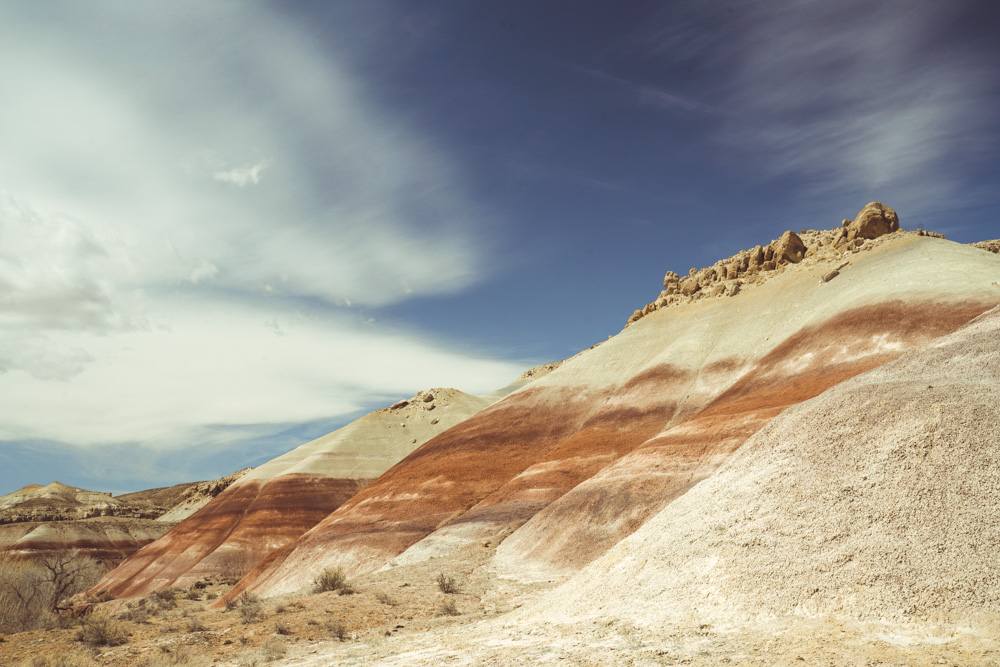
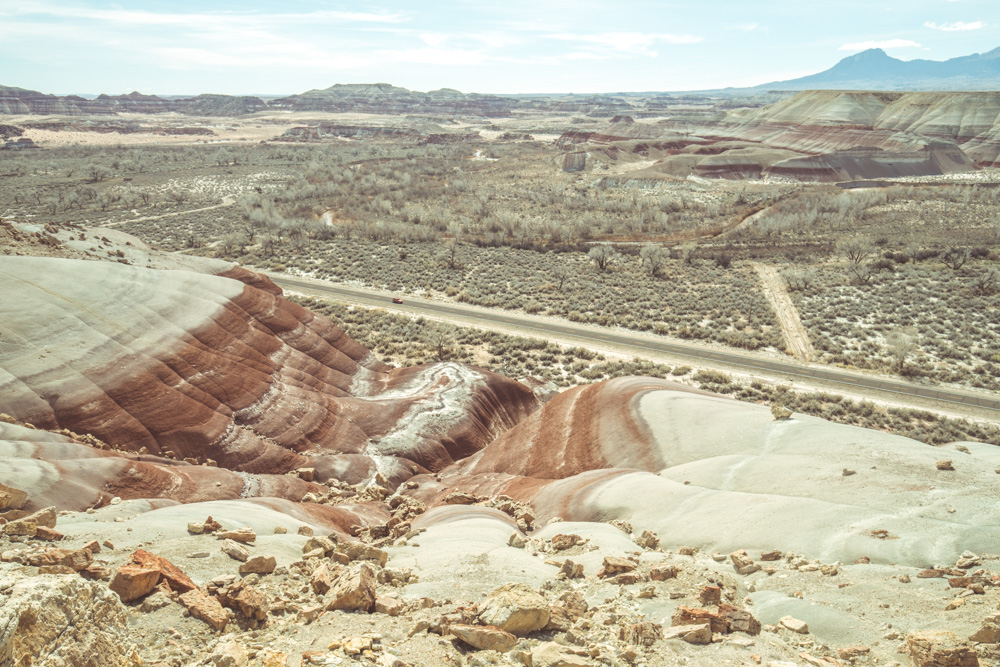
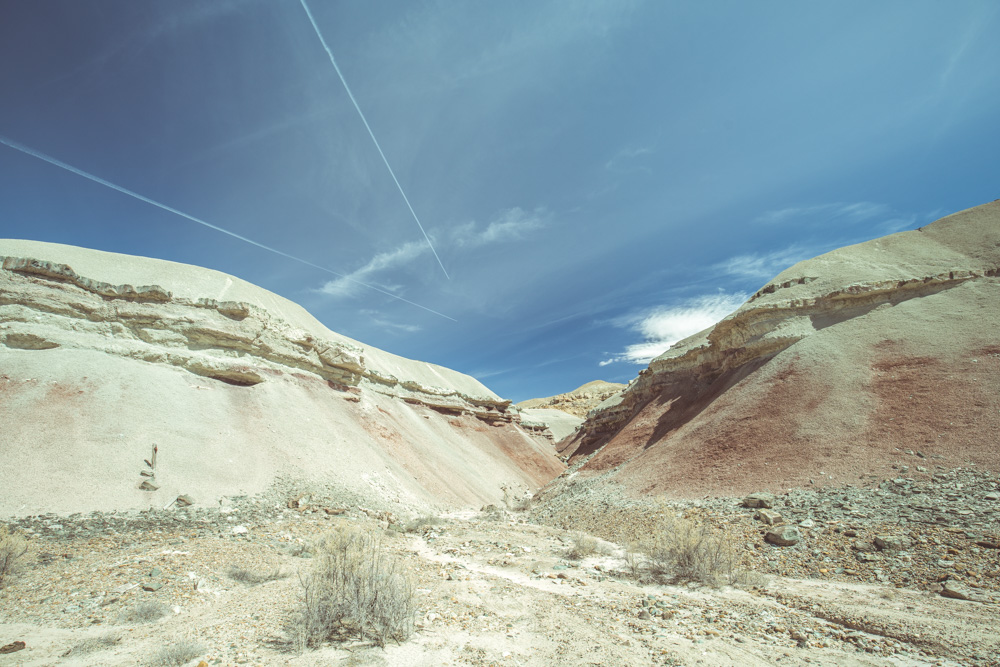
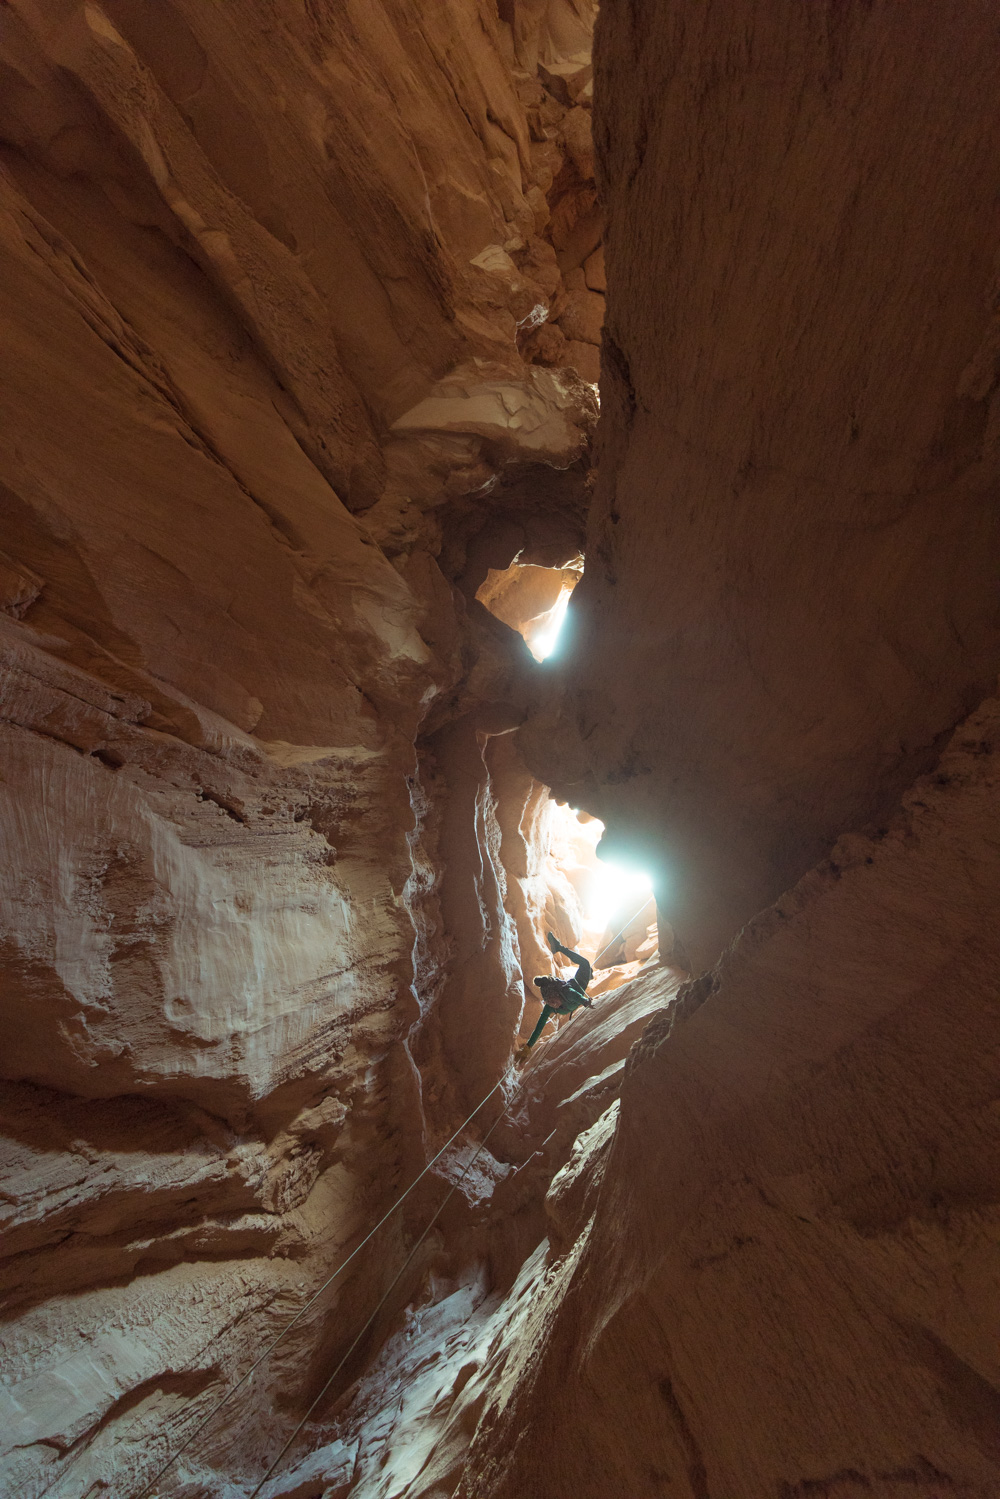
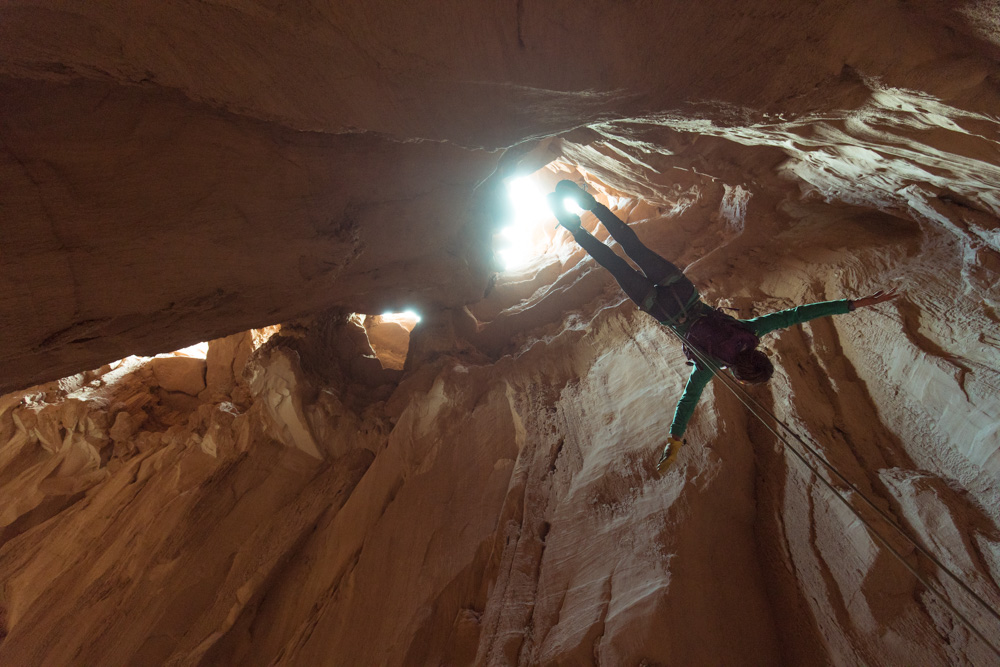
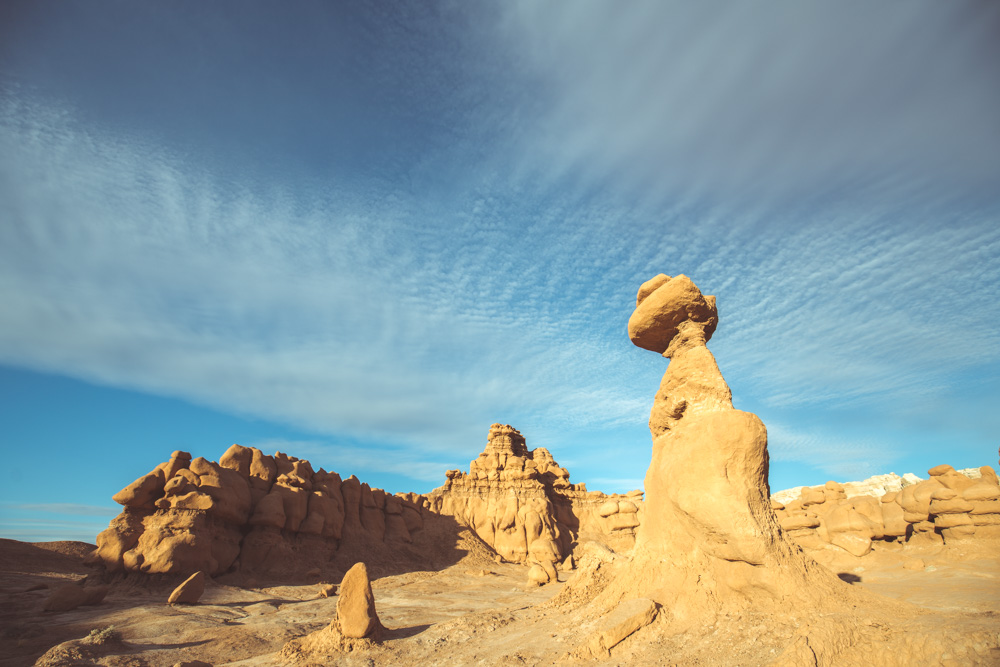
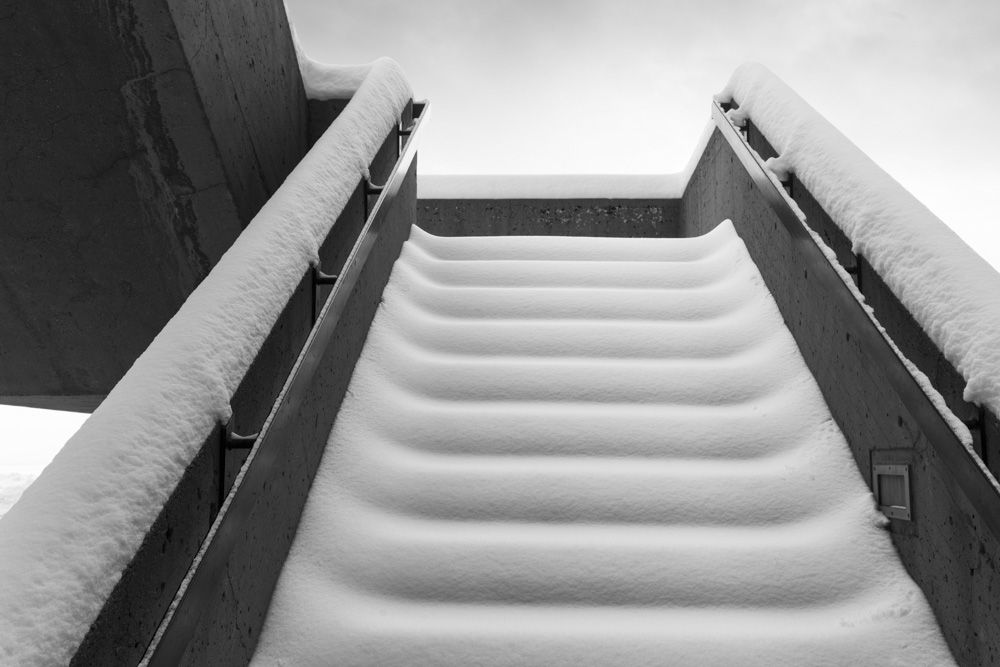
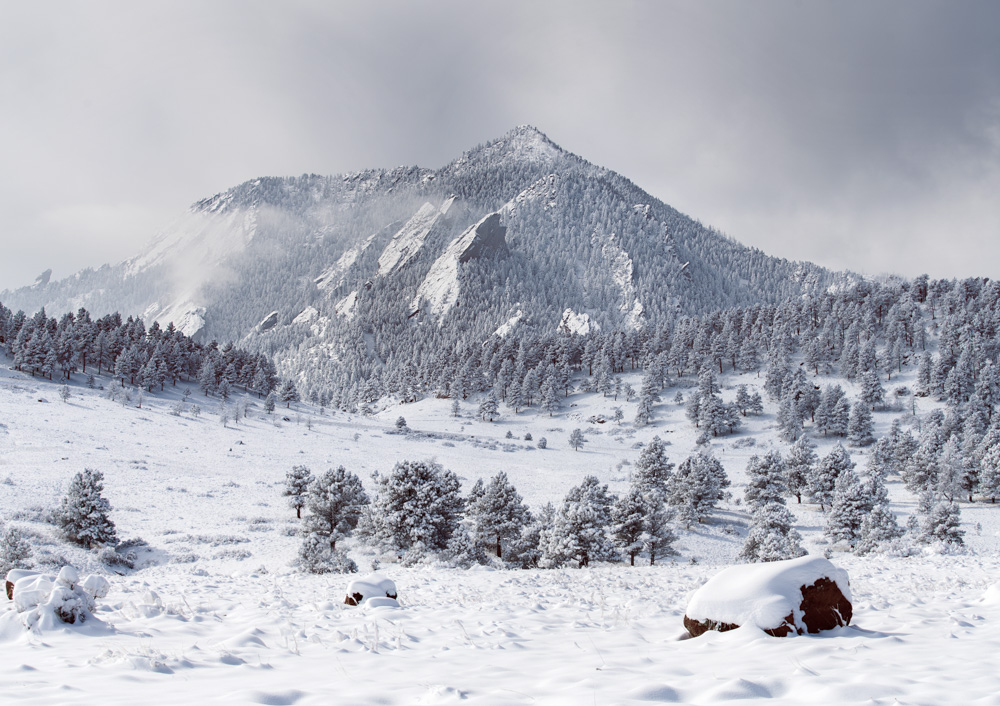
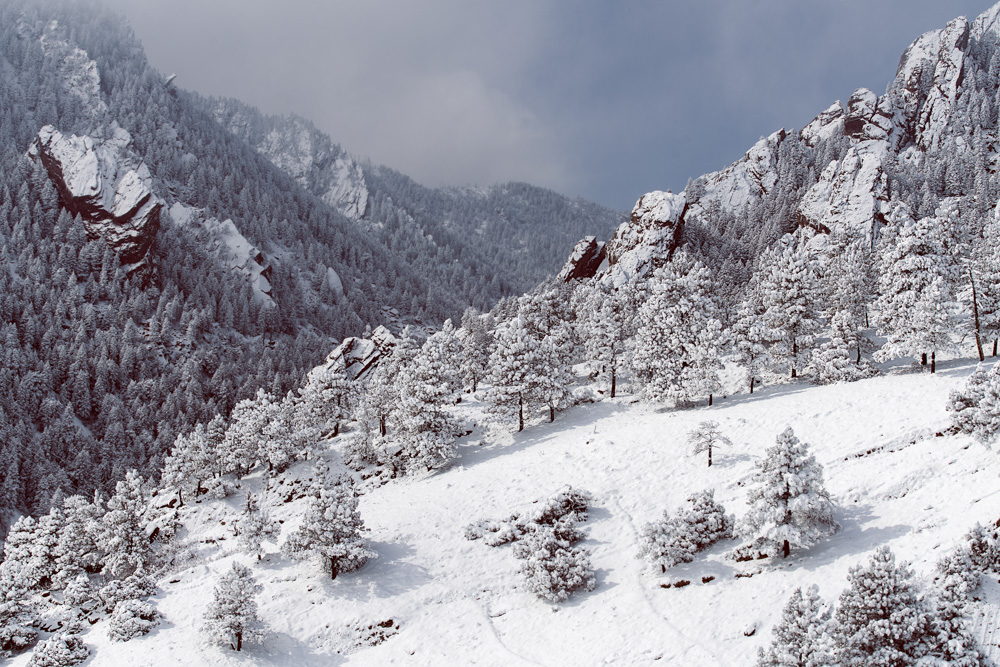
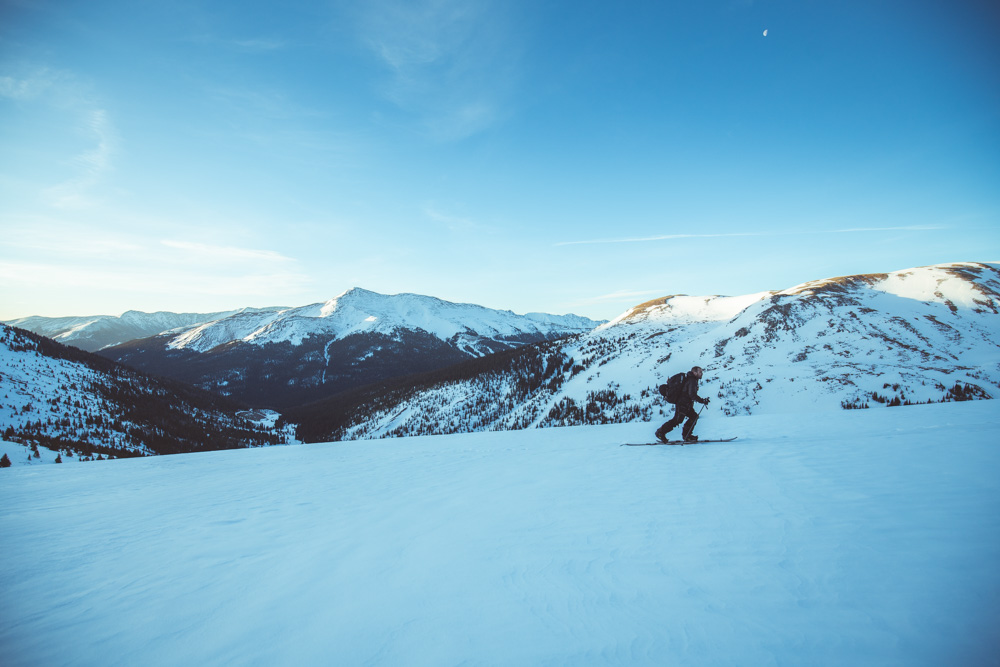
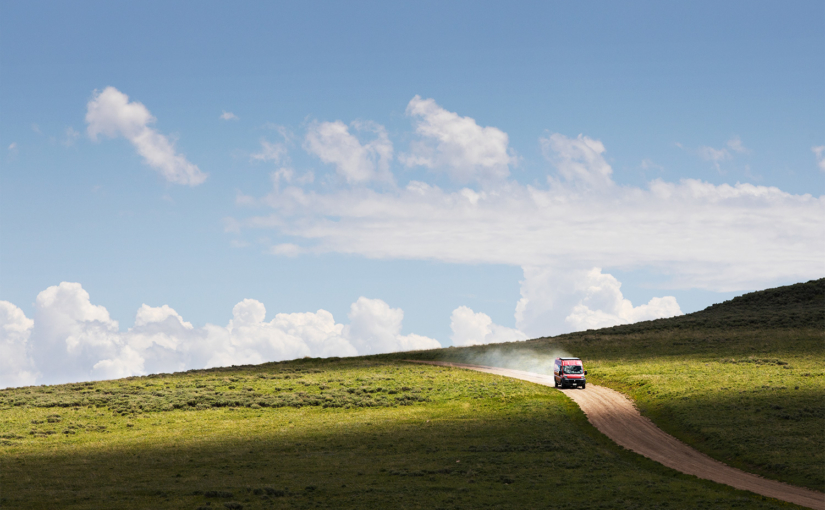
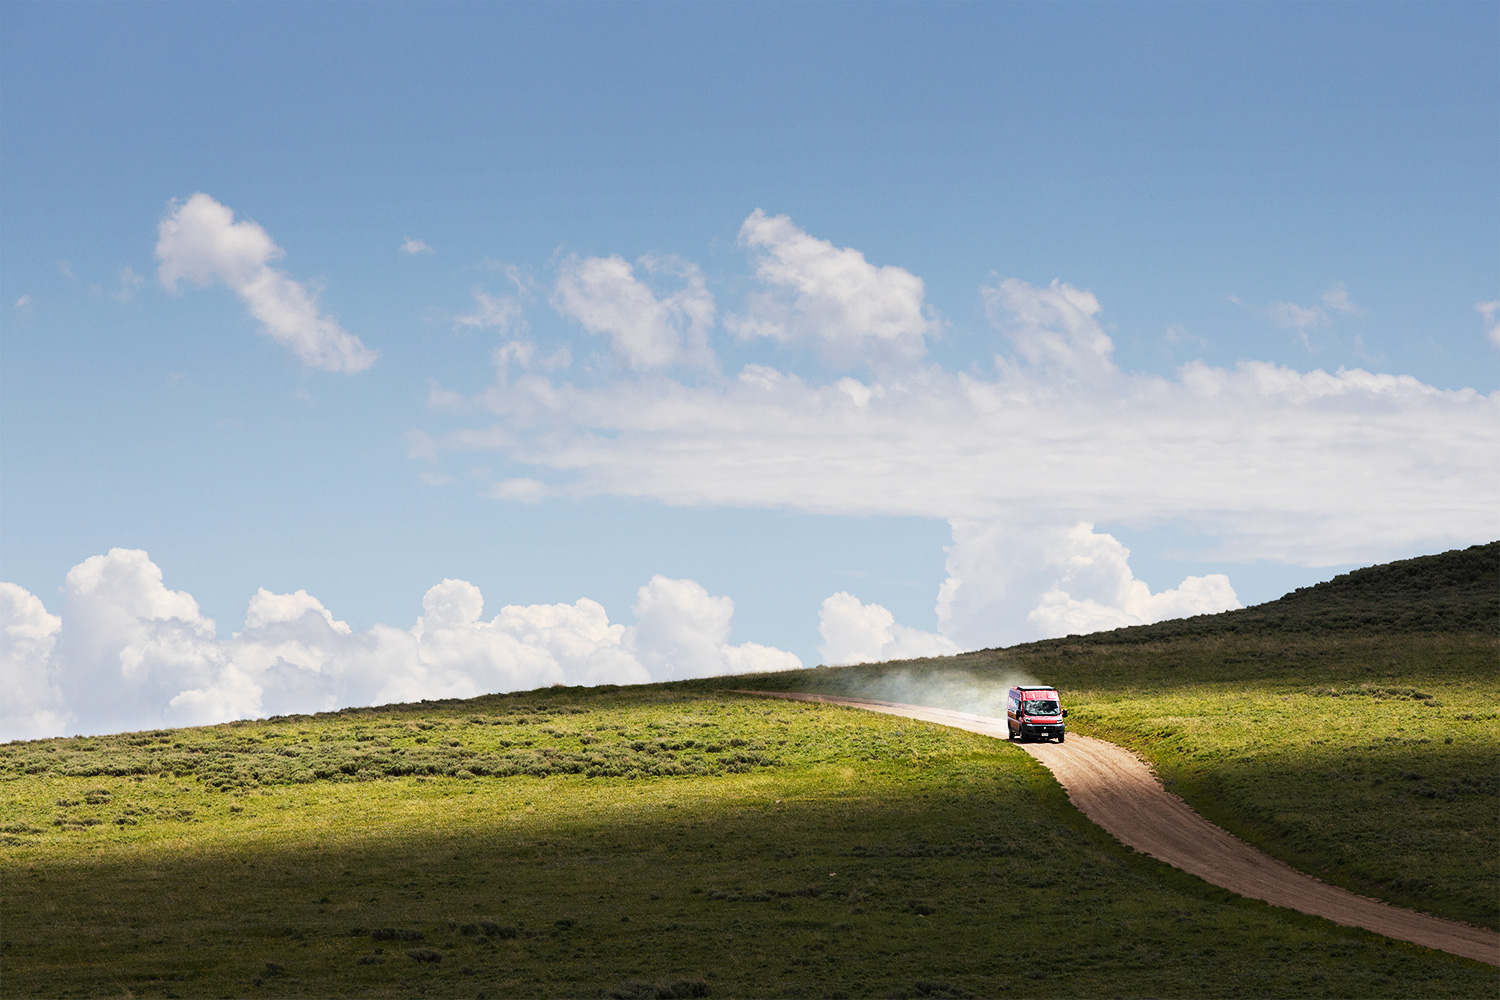
Springtime is the season for long walks with your skis. The snowpack is generally more stable and you can hit big alpine lines. A couple weeks ago, I went on two long walks with skis.
I first tried to get to Flattop Gully with my old roommate, forgetting how far back Flattop goes. We didn’t quite make it all the way to the gully but skied a fun north slope I’d assume doesn’t get skied very often because of how long the walk is. The exit is one of my least favorite I’ve done, second probably to Silver Couloir on Buffalo Peak.
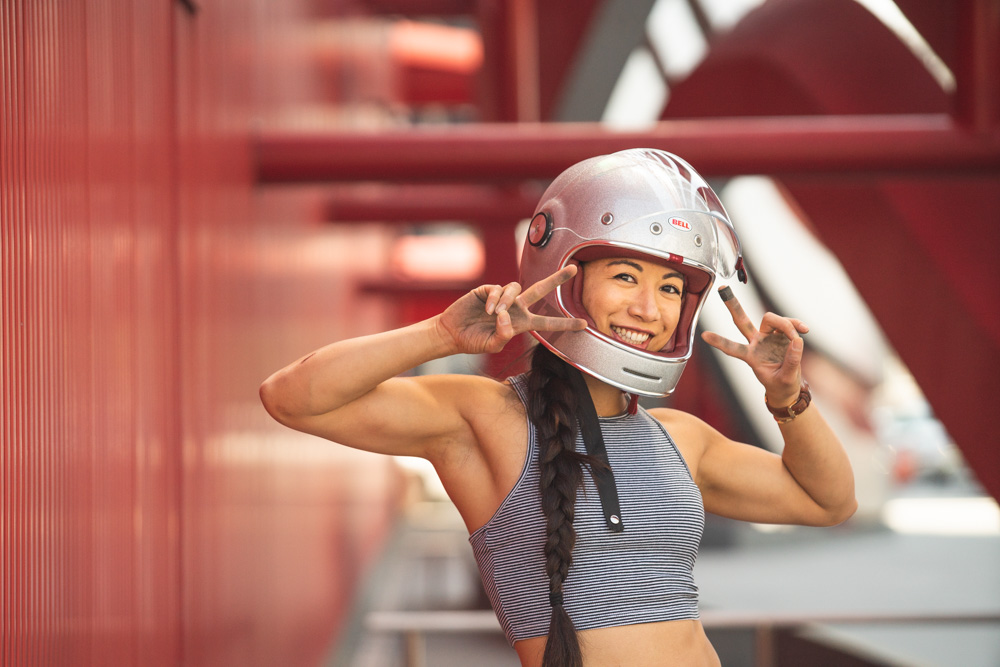
Bindu Pomeroy, of Vail, and I had been trying to get out since we met at Outdoor Retailer. Three days before the Loveland Pass area received somewhere around 20 inches of new snow, and he thought Citadel Peak would still be good. I haven’t skied too much in that area, so was open to skiing something new.
I left my house at 2:30am to be at the trailhead at 4am. Bindu and his fellow split-boarder, Jon Adgate, show up a few minutes after me. We shuttle a car to the Herman Gulch Trailhead, where we’ll finish, and drive to the gate at Dry Gulch.
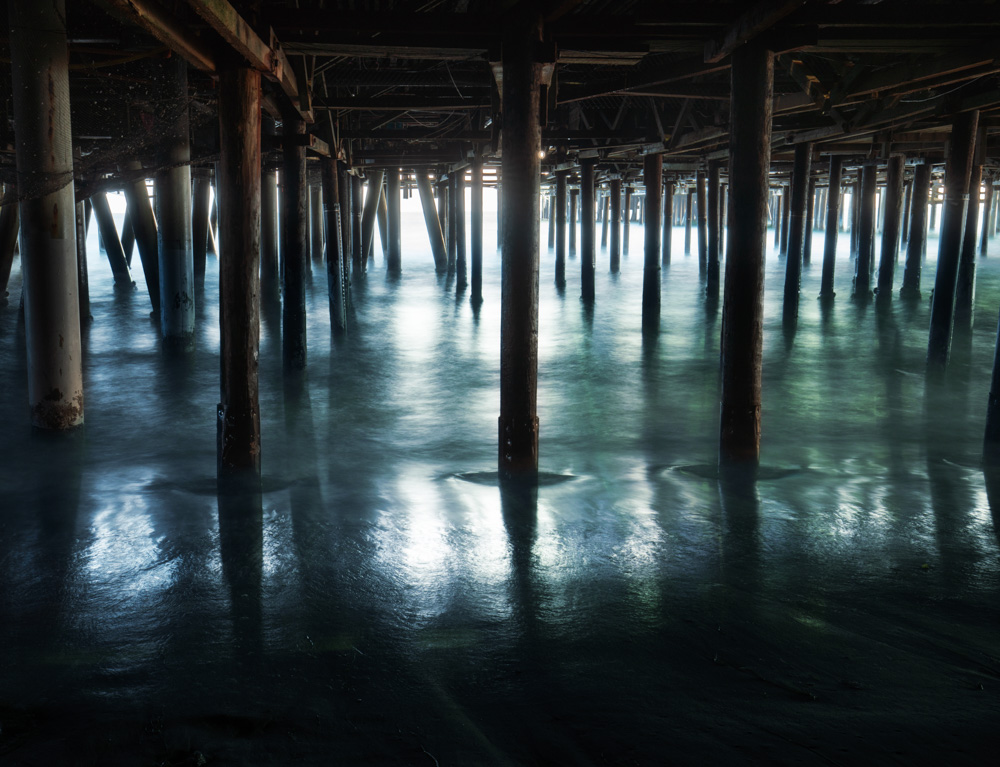
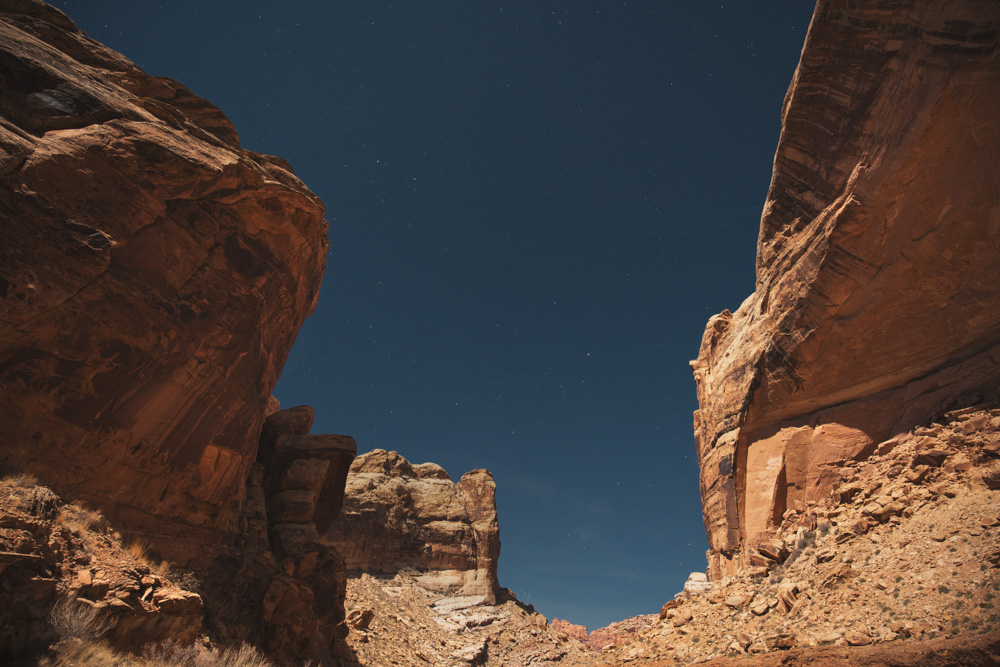
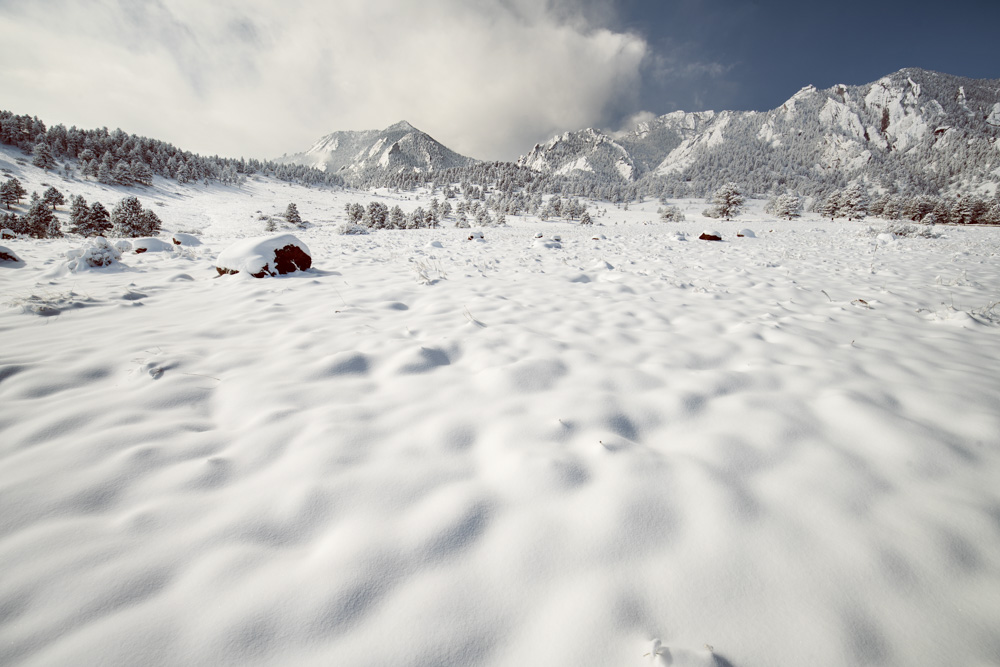
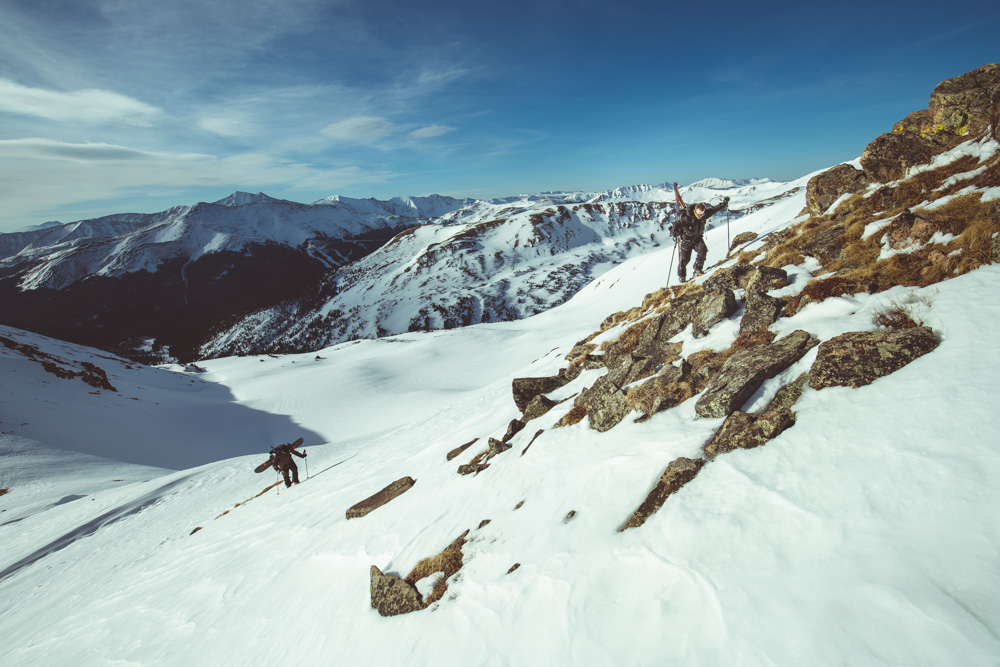
The moon, while not full, was bright enough that we didn’t need headlamps for the start of our skin. You follow a low angle road for about a mile before turning uphill, pulling up your heal risers, and walking up the steep creek – hearing the water running under the thin snow cover. We had to traverse under a face that I would not want to be under in unstable snow conditions, then go straight up to the saddle between Hagar and a few false summits from Bethel.
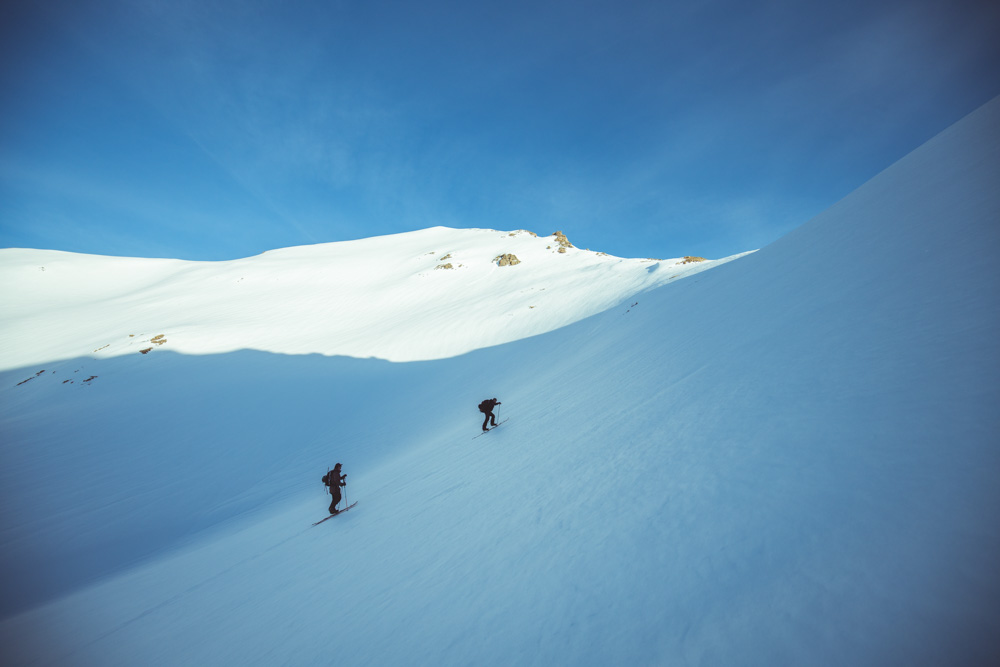

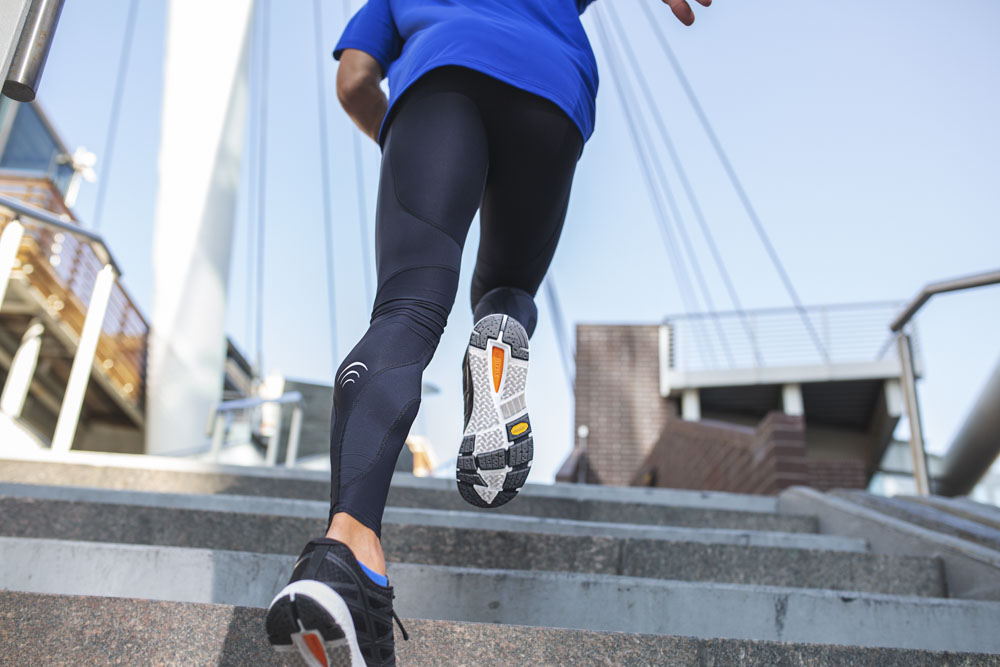
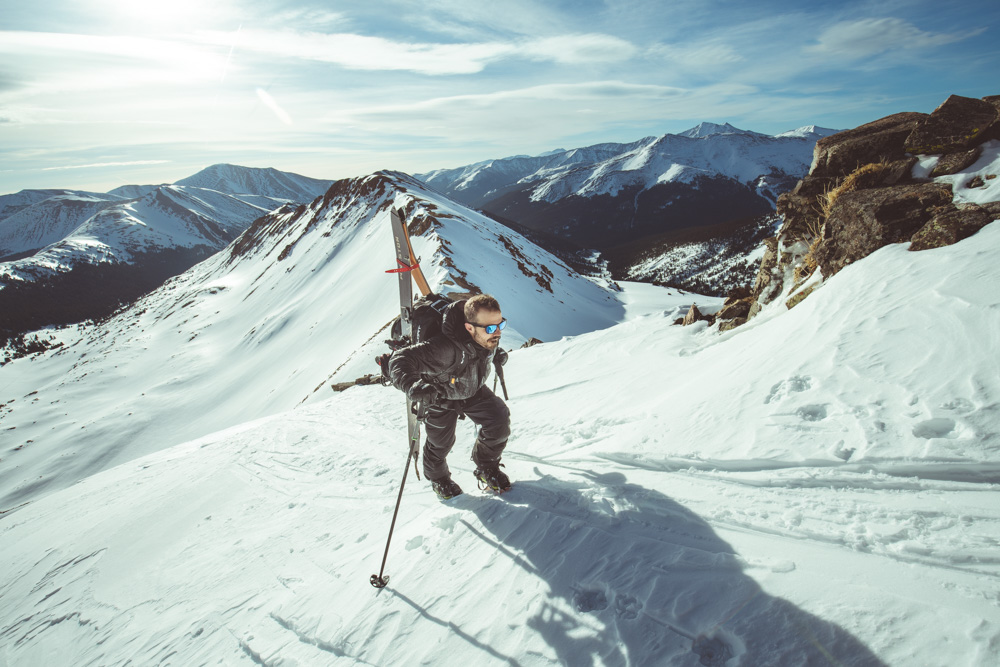
I figured out with my Fritschi Ttecton binding, if I partially took it out of walk-mode the brakes would drop, which allowed me to walk almost straight up the hard-frozen steep face. I also found that this technique stops working when the sun warms up the snow, you just slide back down, the brakes sliding through like butter.
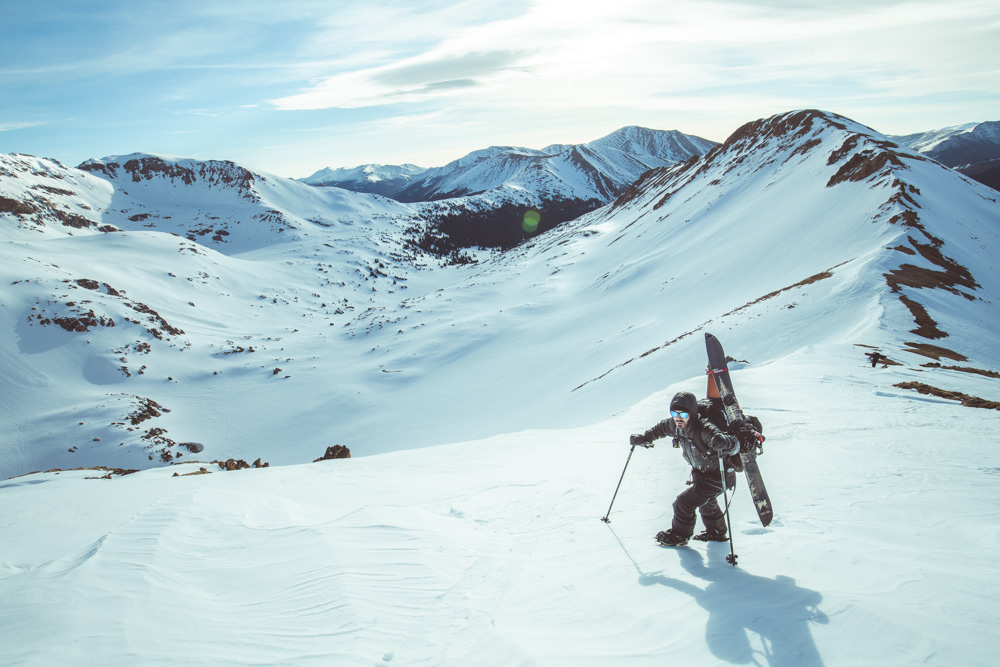
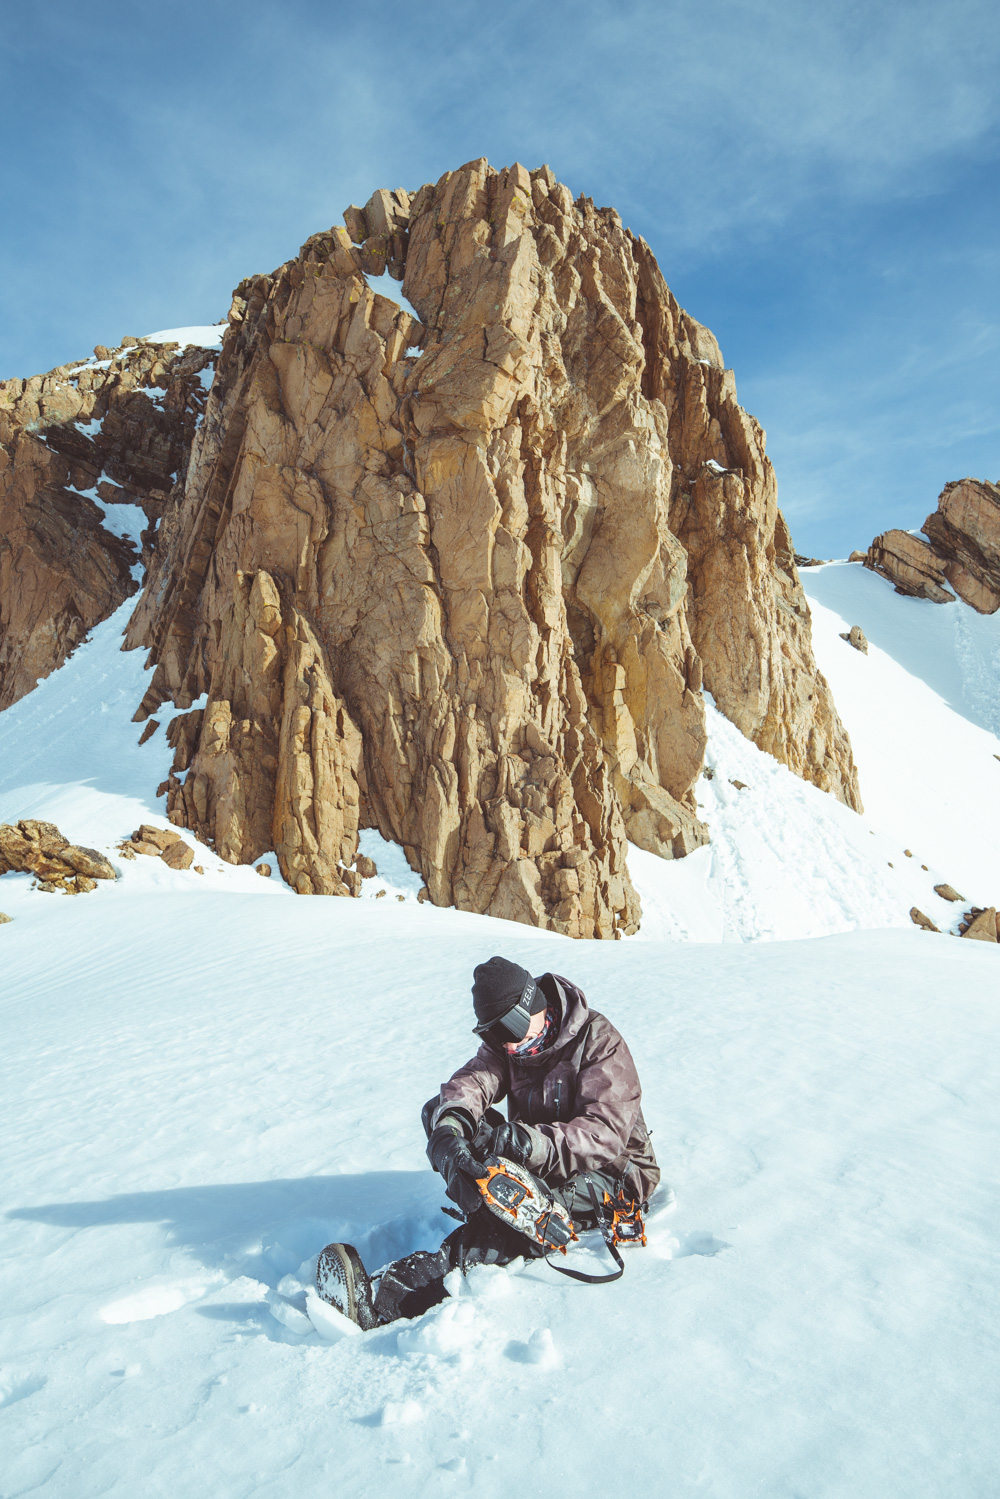
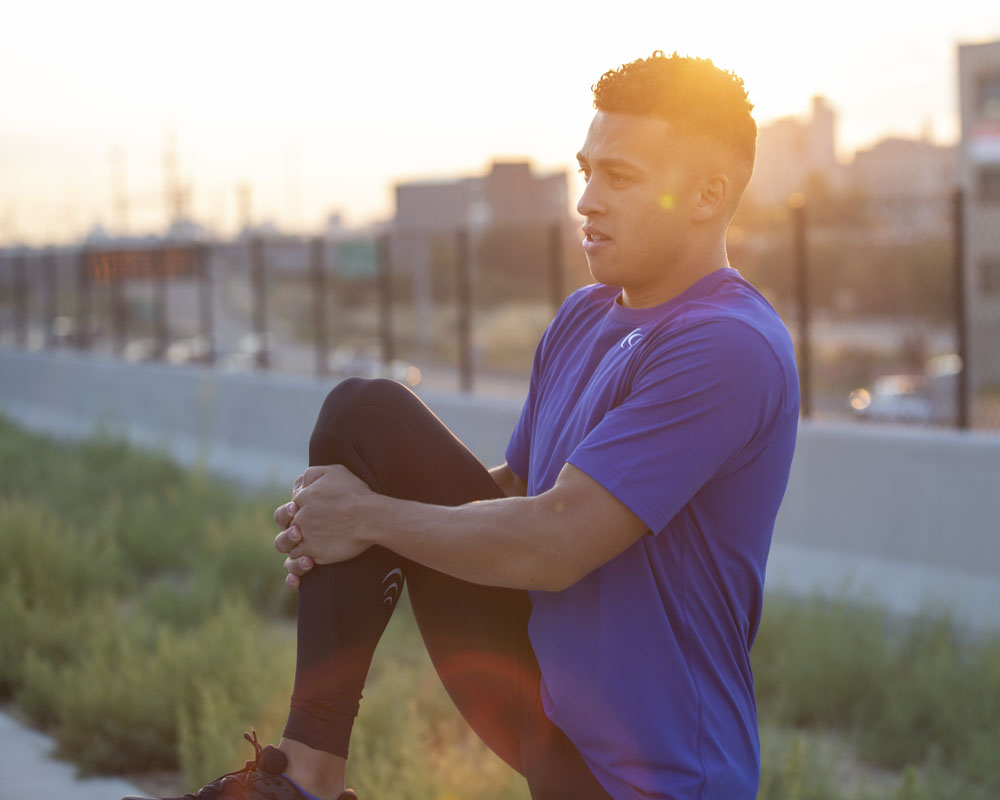
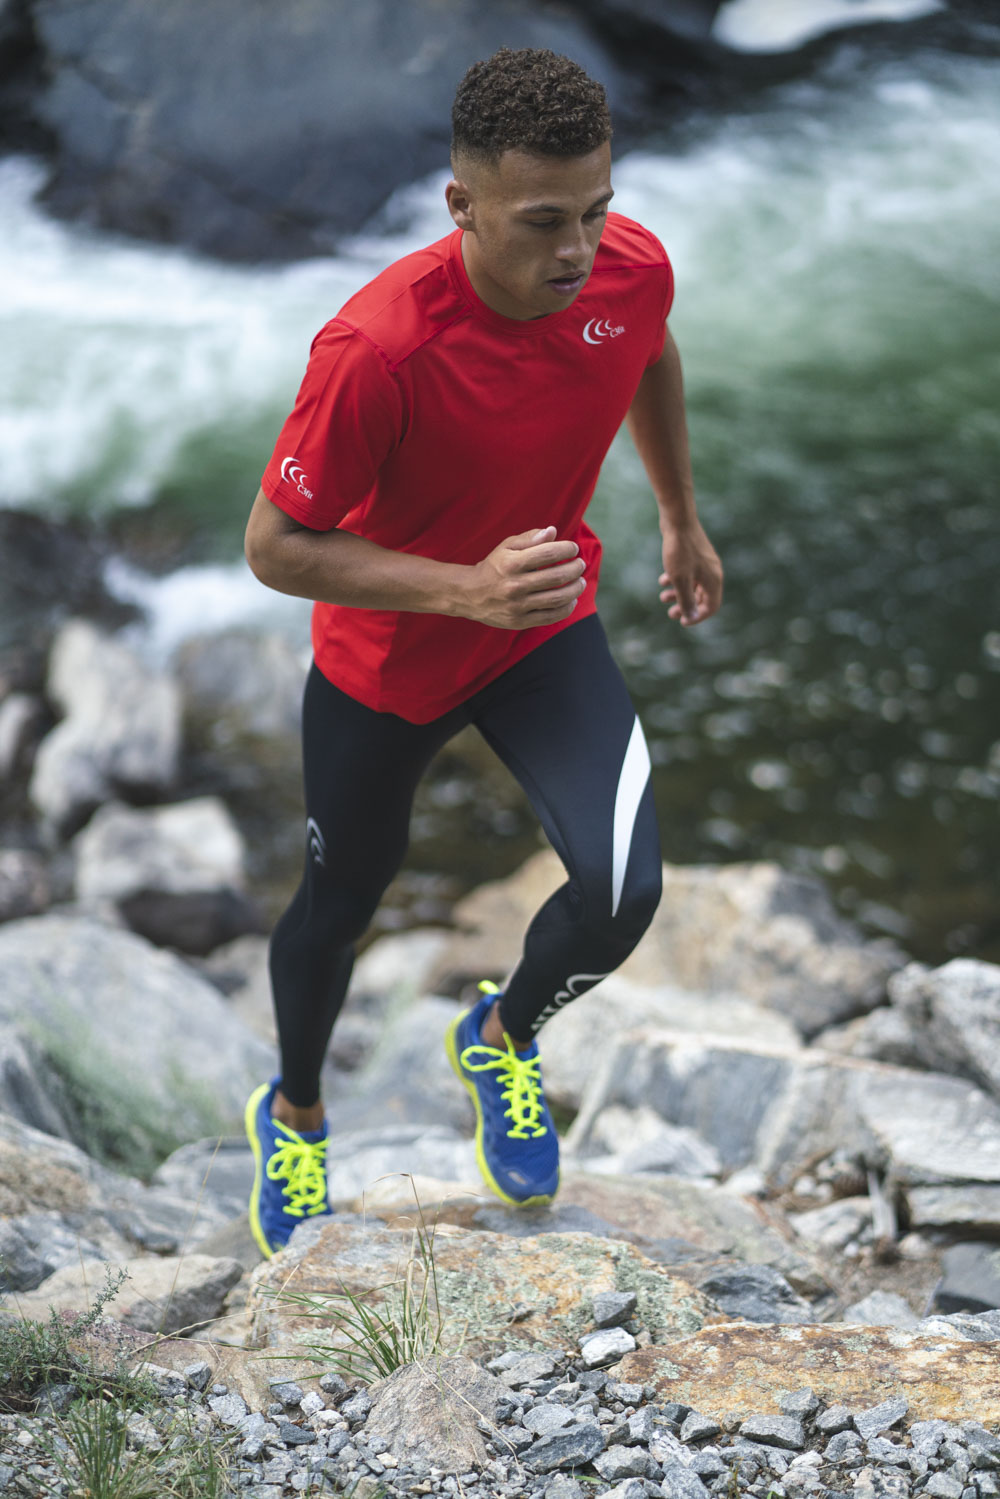
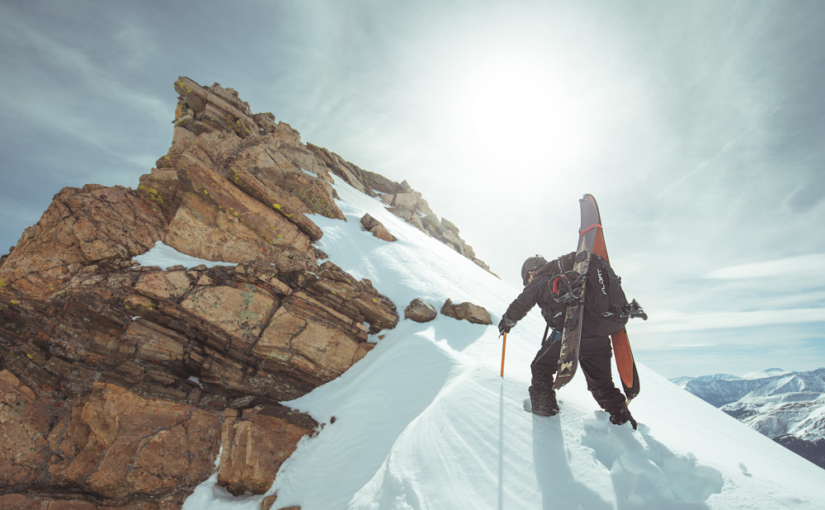
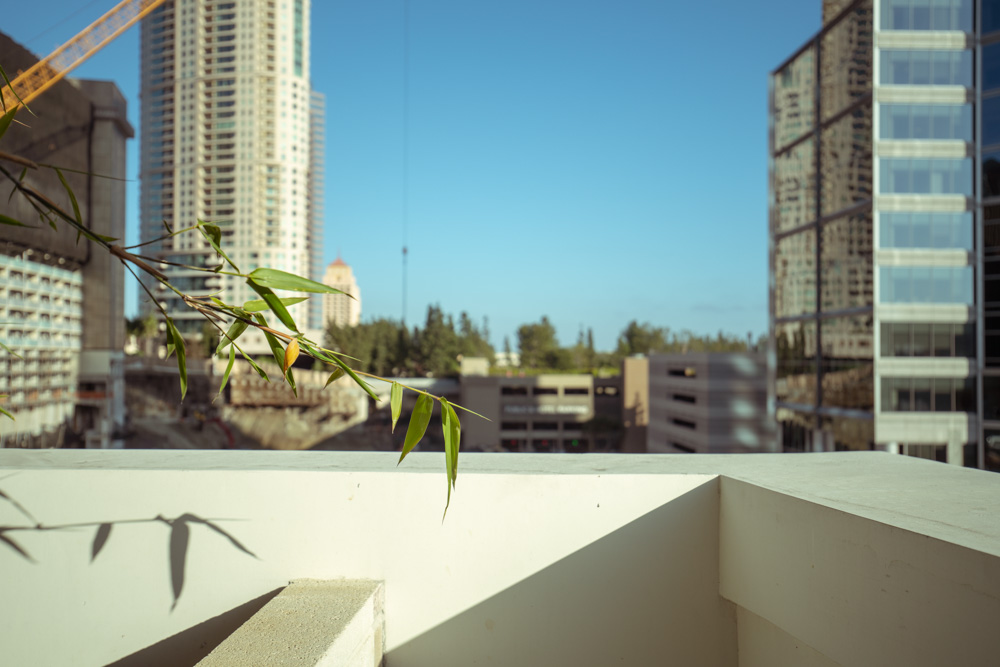
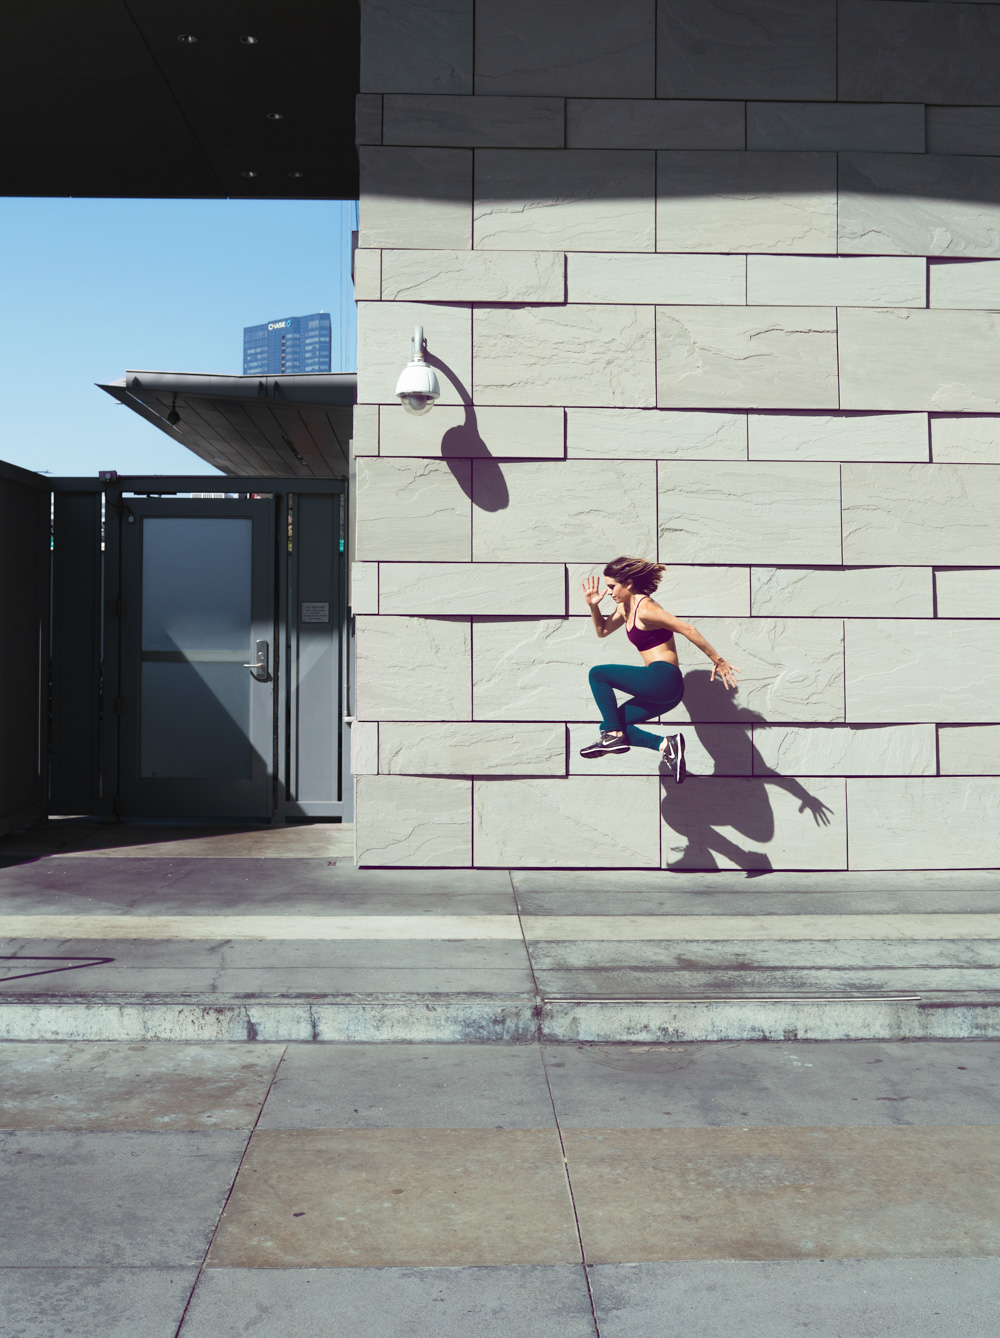
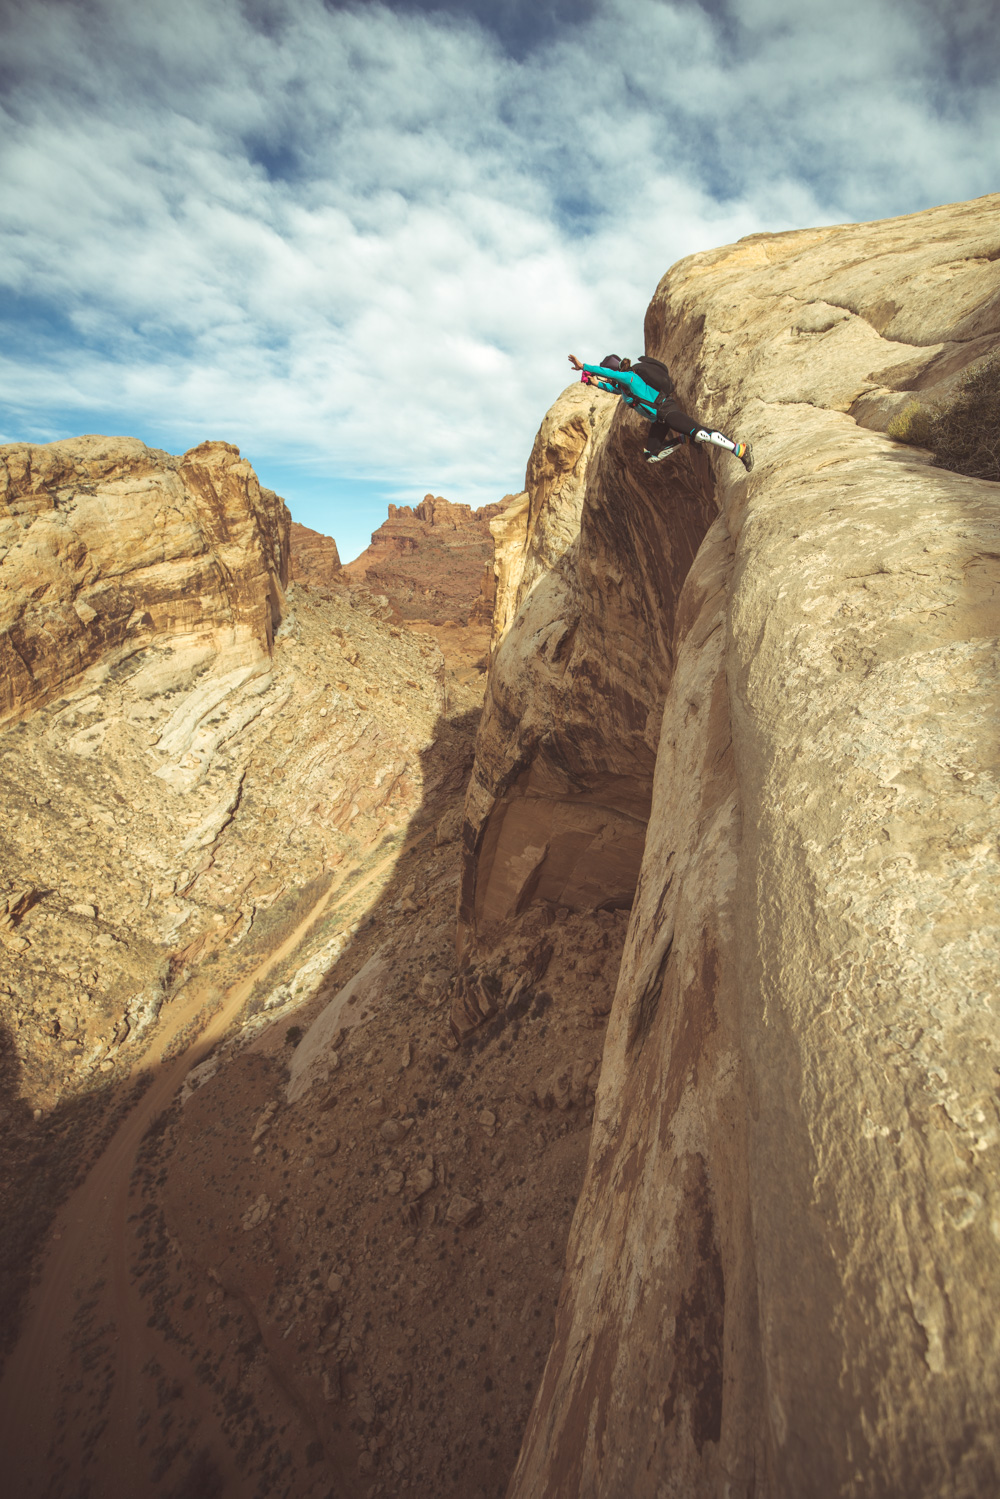
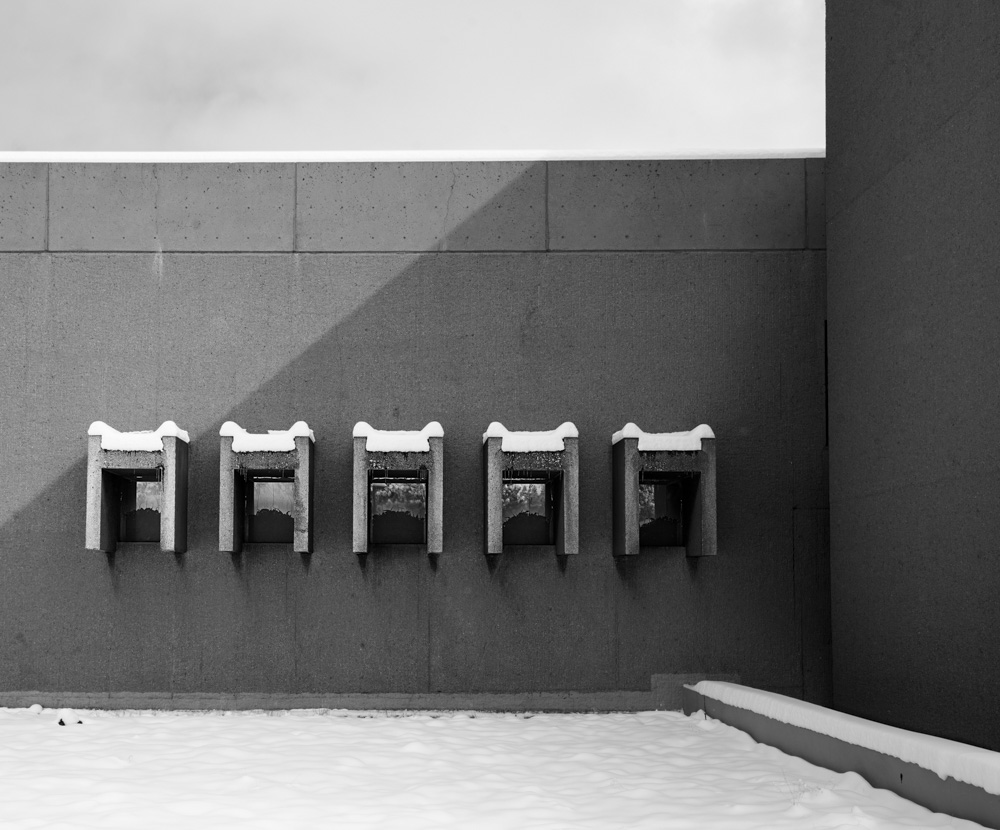
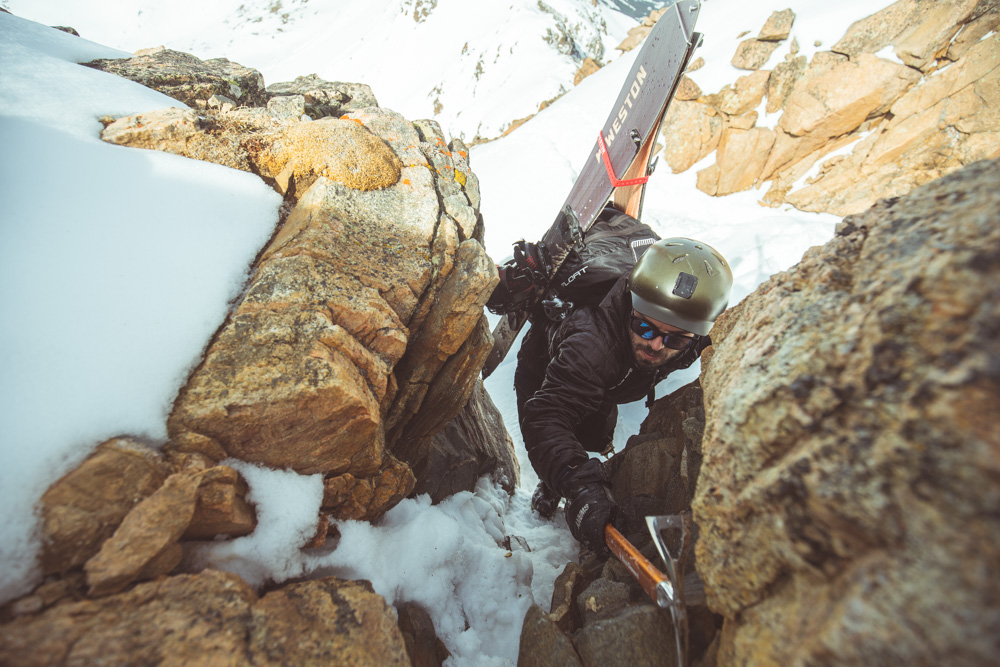
Bindu puts on his crampons for the final push, to the top of the rocky peak behind him
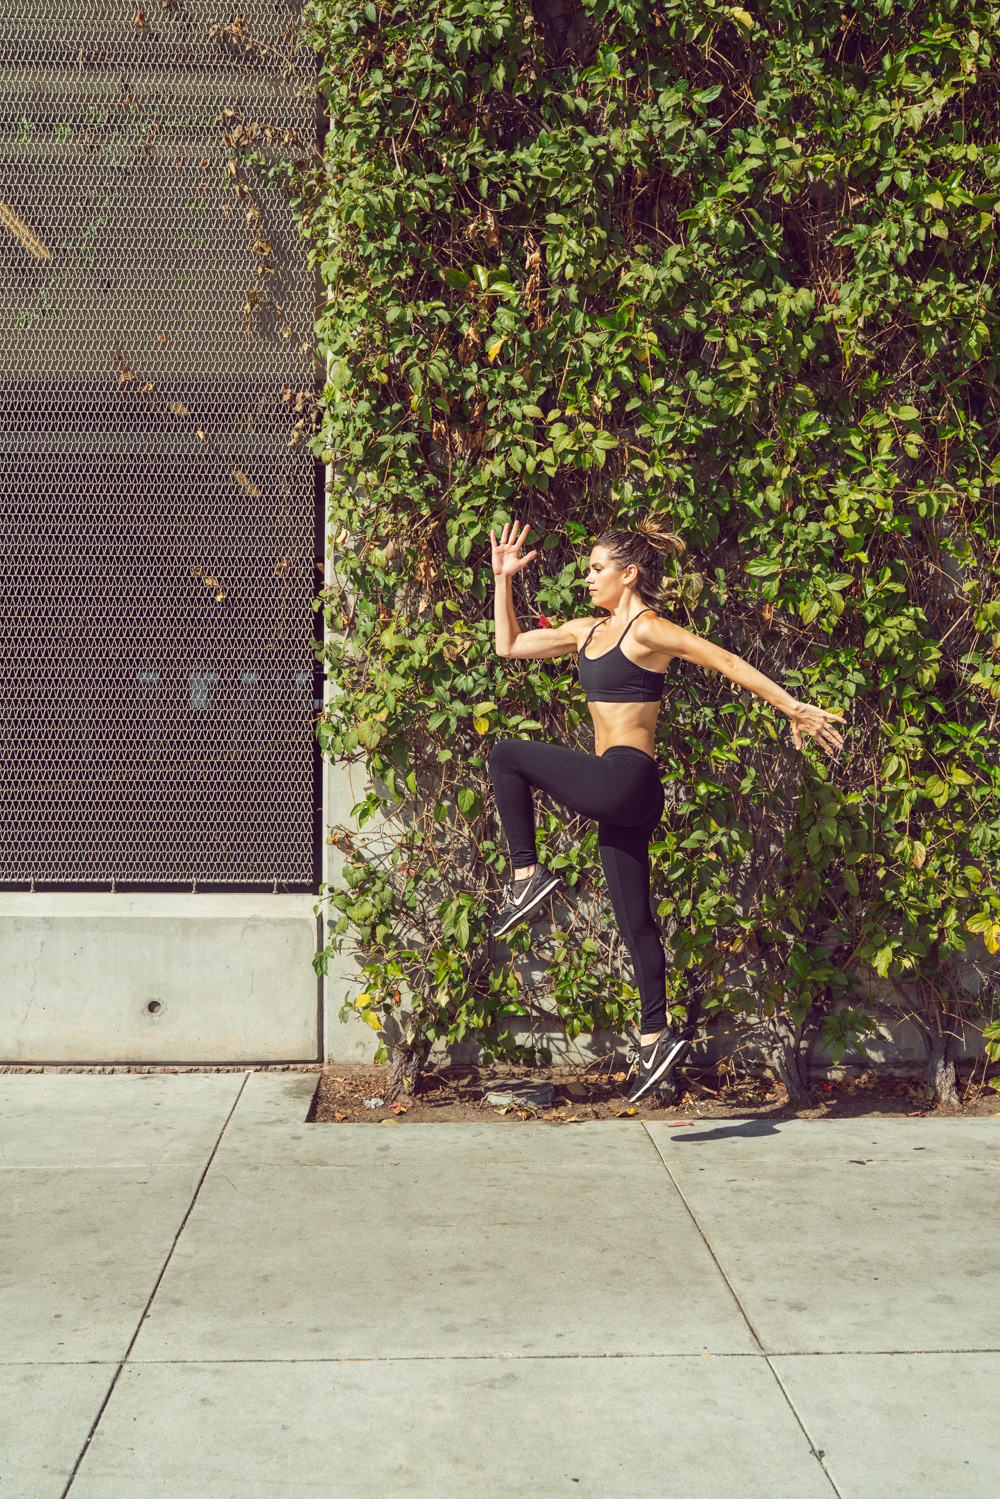
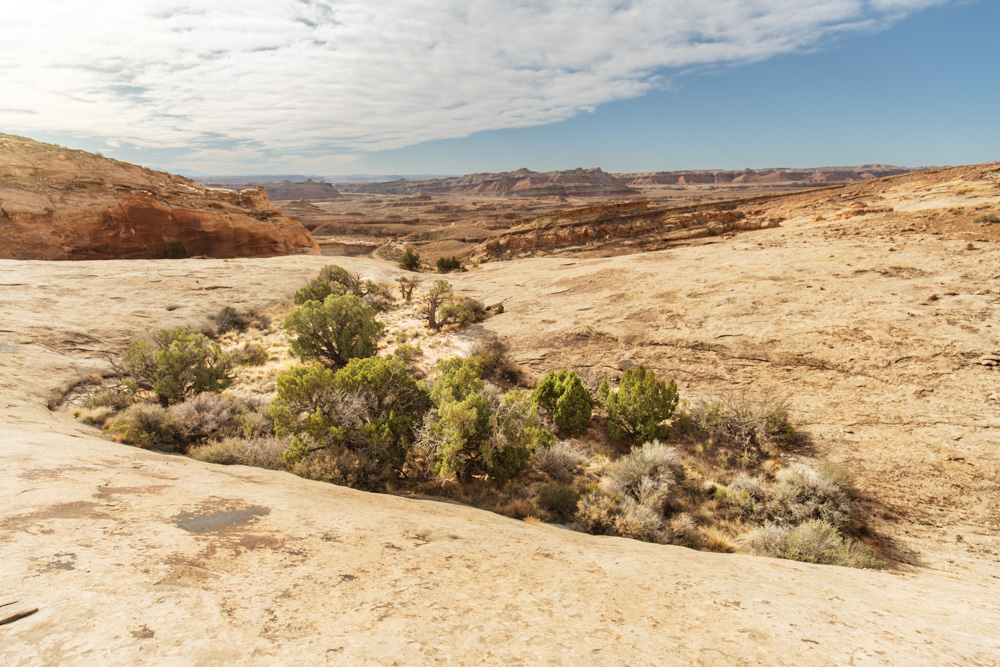
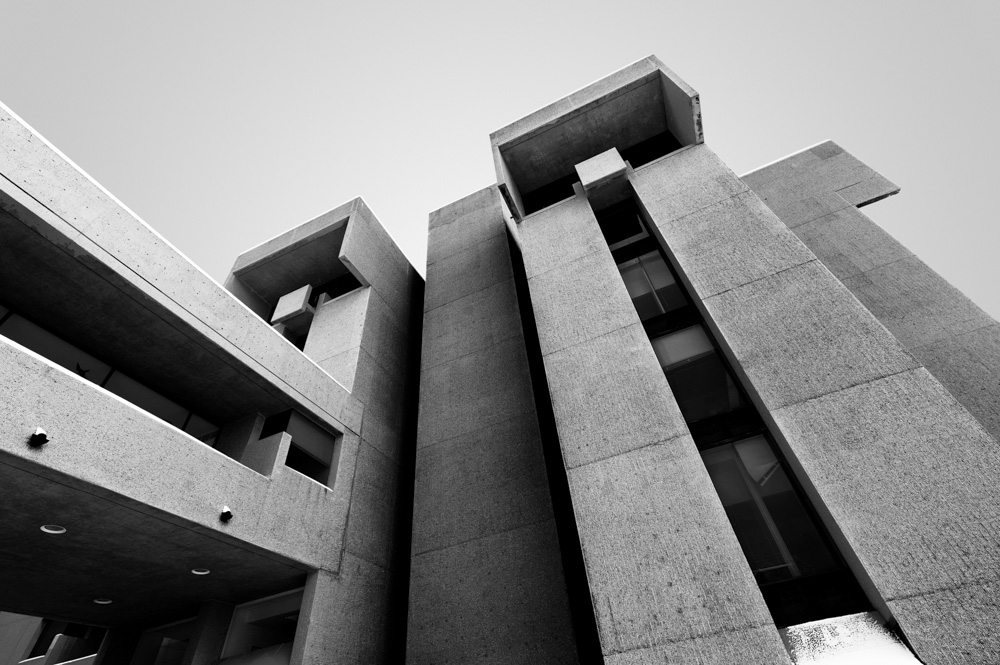
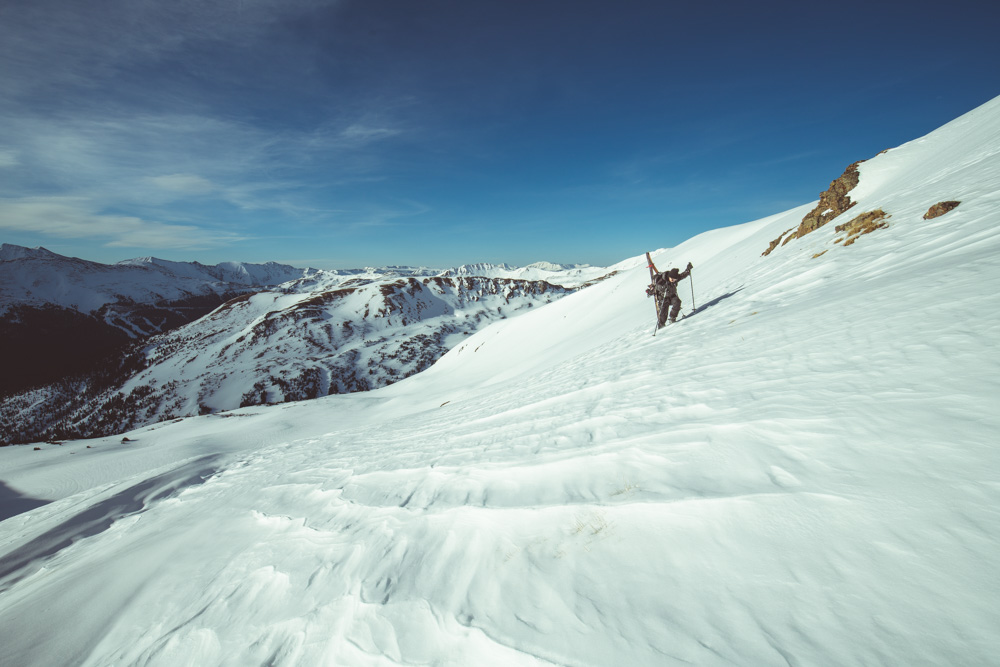
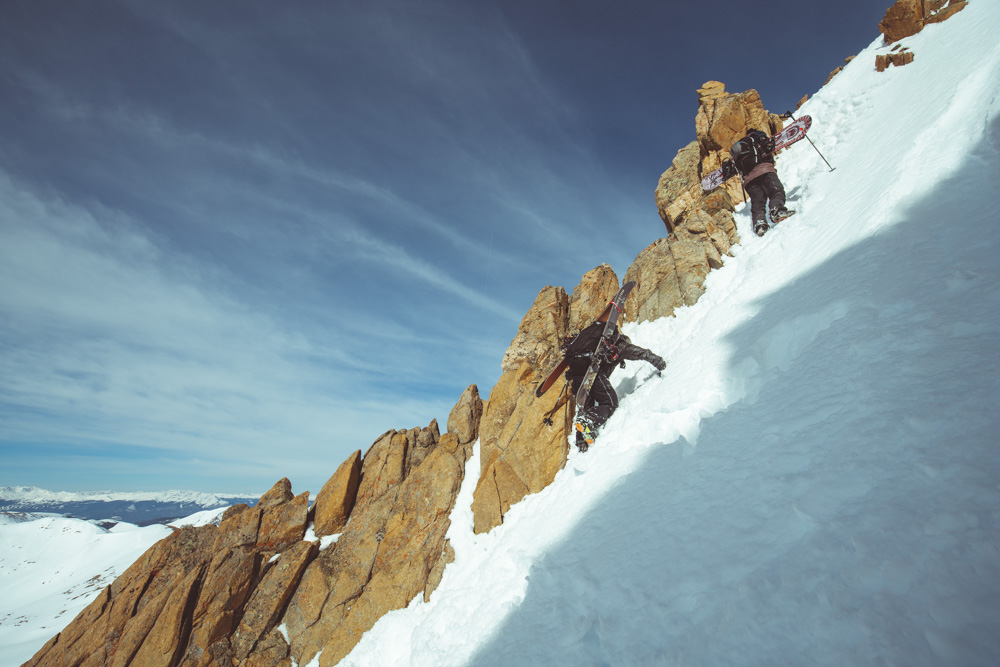
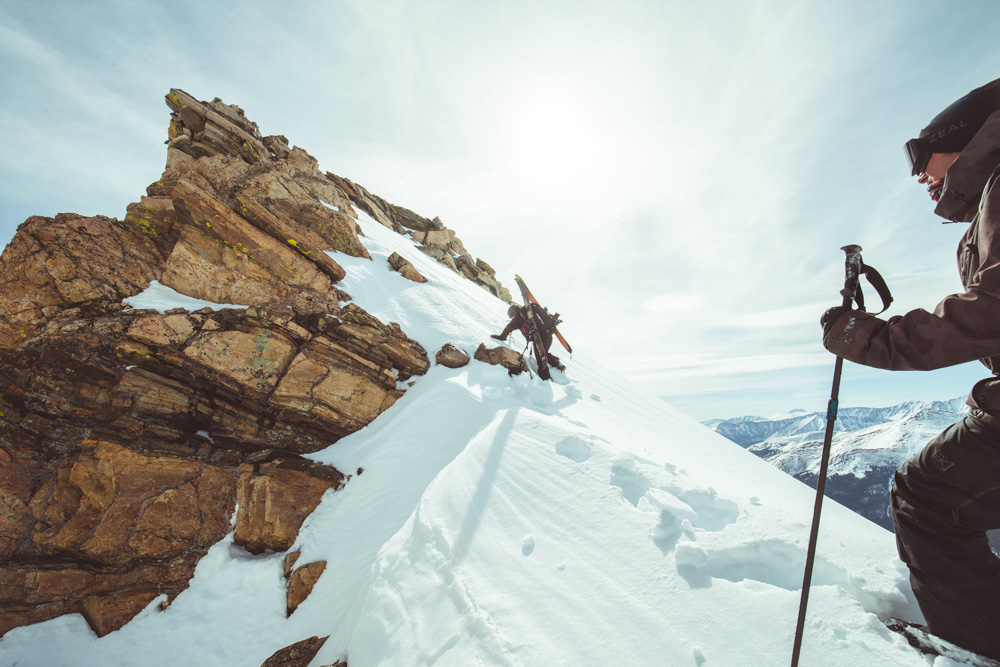
We walk the ridge and skirt to the northwest of the Citadel to find someone had oh-so-kindly already put in a boot pack up the steep snow slog. As we gained the summit ridge, we were finding the snow was softening up very quickly.

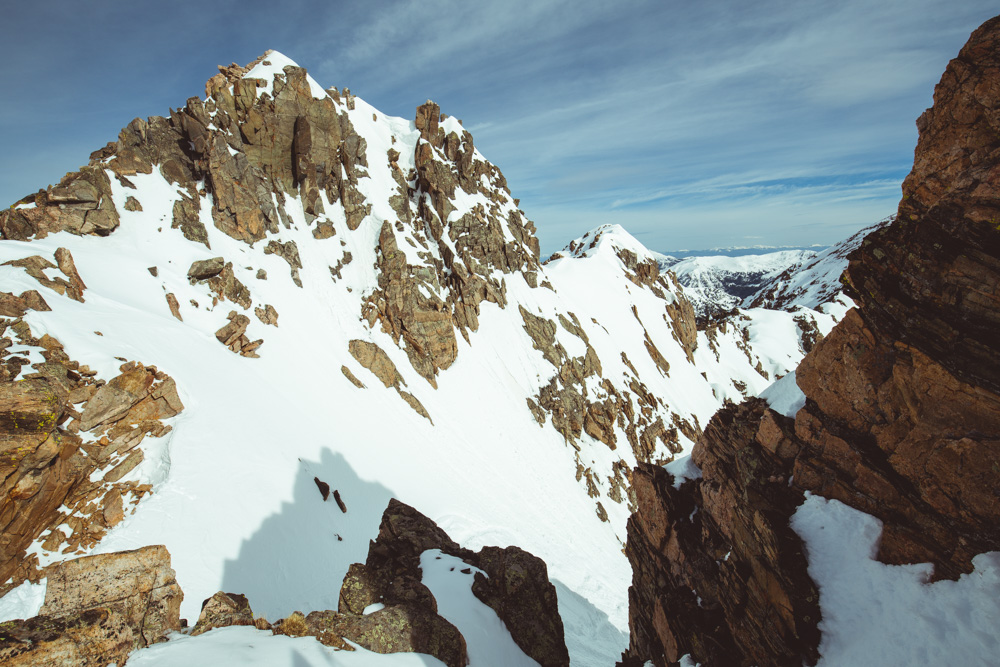
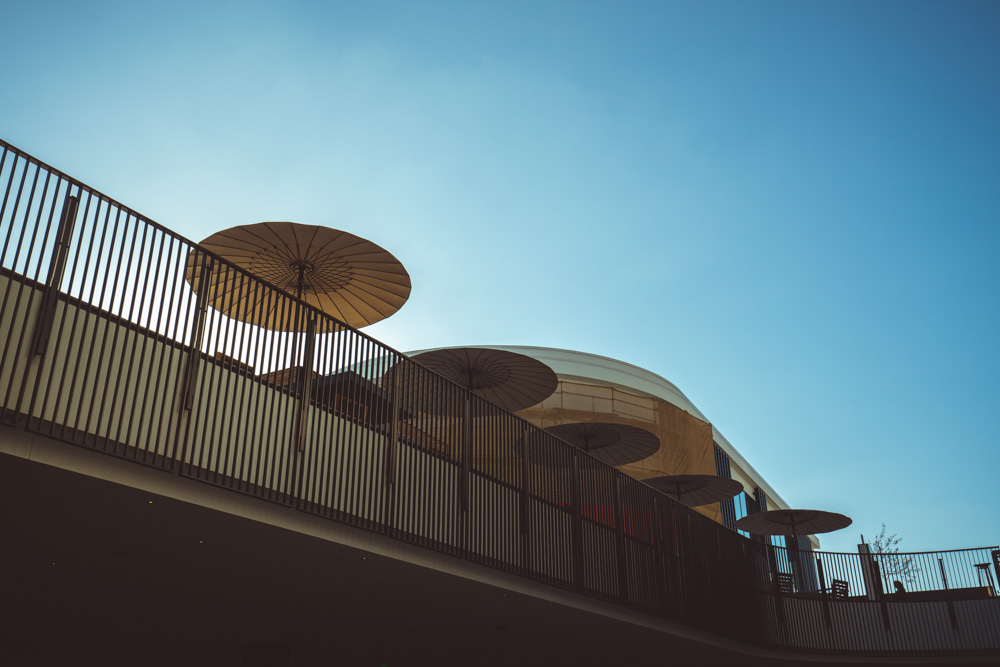
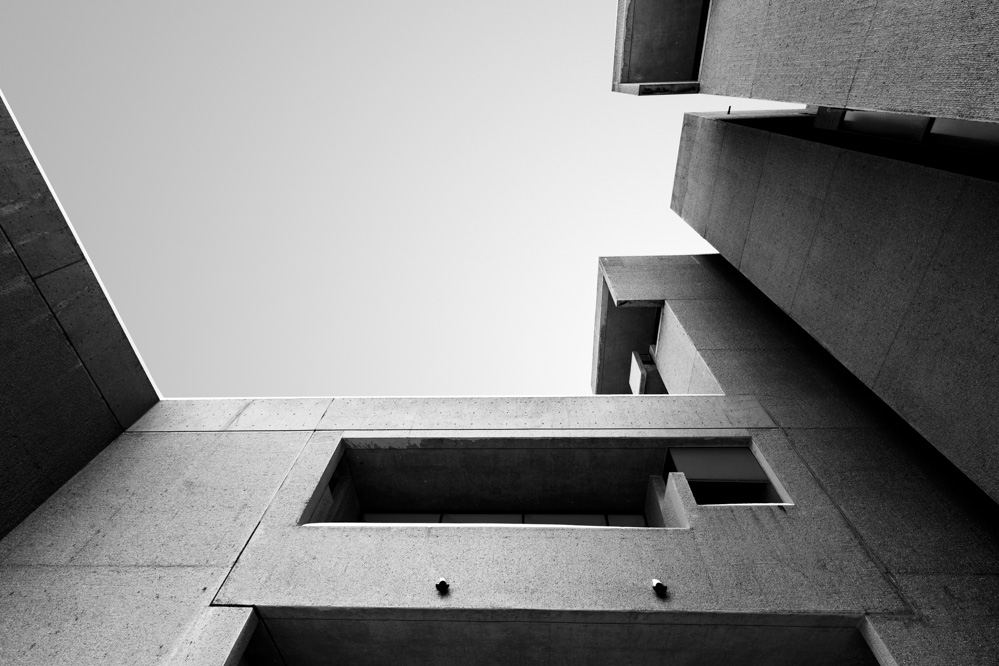
Looking to the northeast to Pettingell Peak
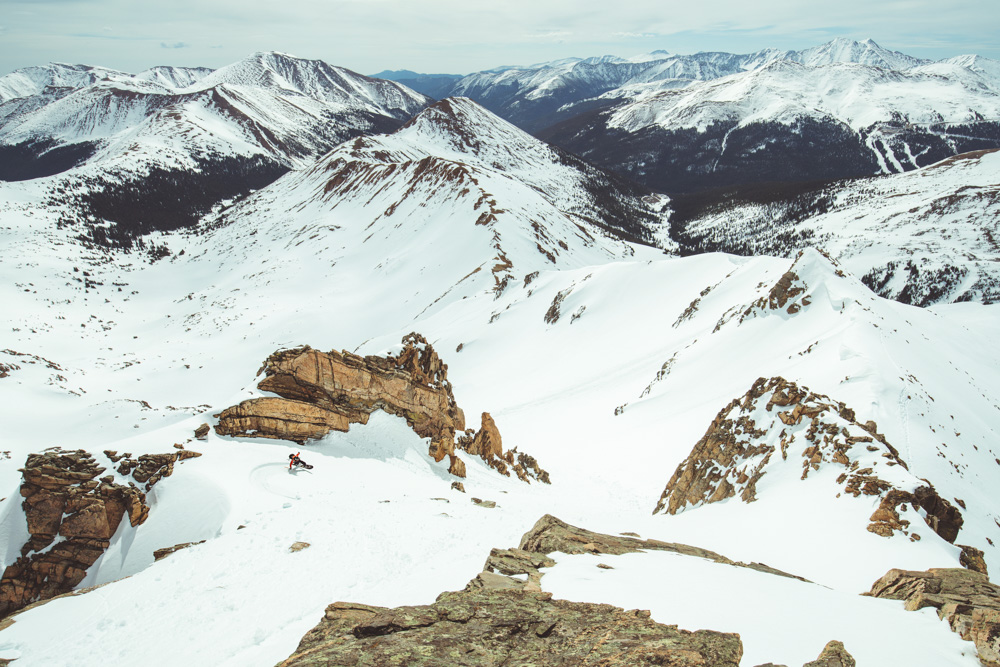
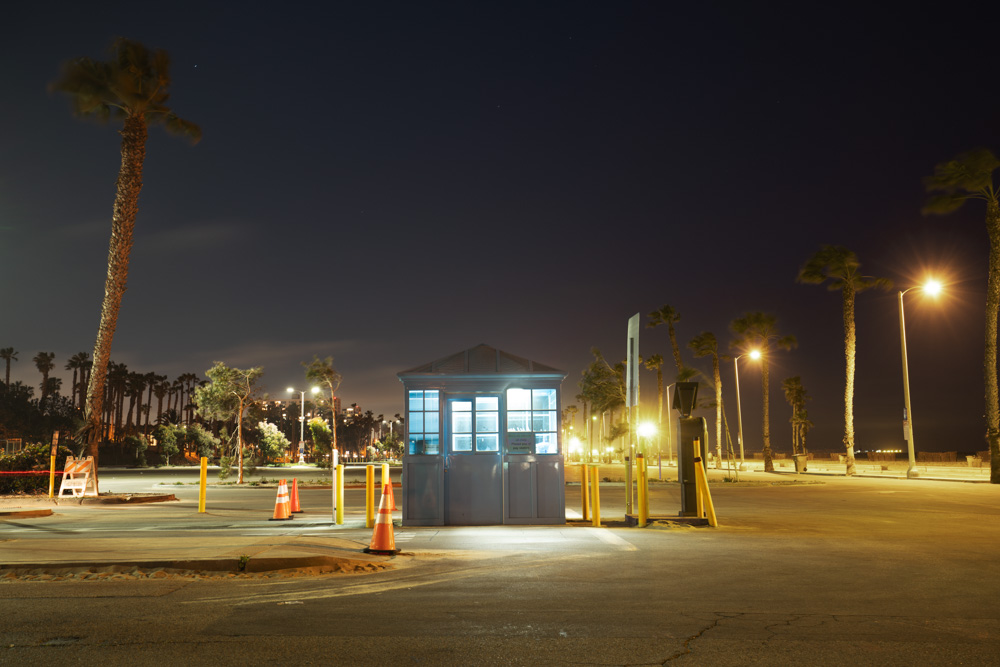
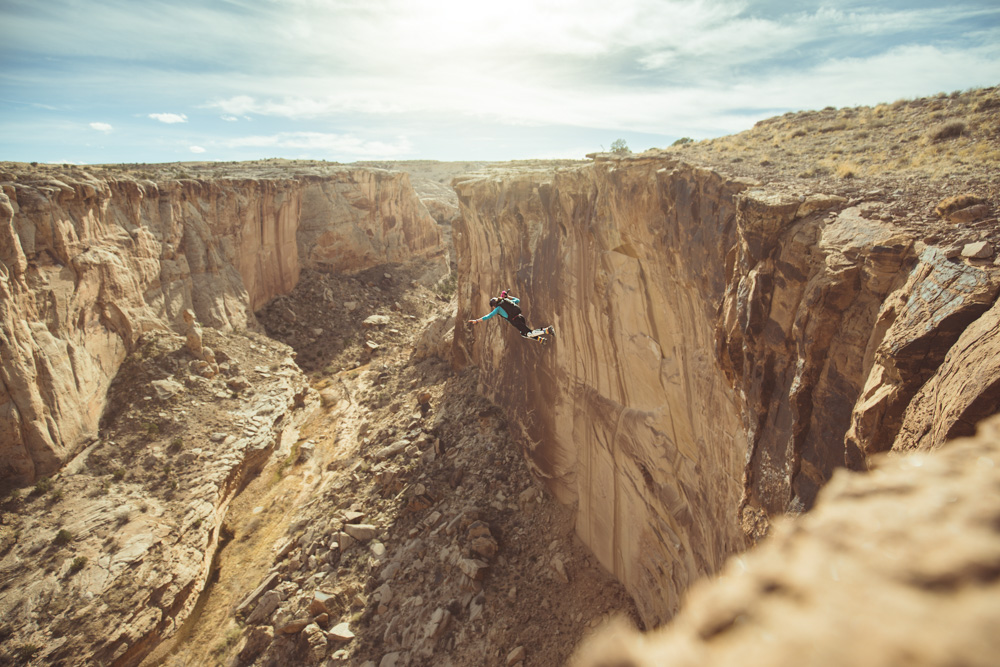
By the time we are set to go, a few wet slides and pilling are going off on east facing slopes. Bindu and Jon (carving in the photo above) choose the left route down the couloir (which looks far less steep at super-wide angle in the photo than it is in reality). After both of them are out of slide danger, I pick the shoulder on the right. It took me maybe 10 minutes to finish shooting and get set to ski and in that time the snow had warmed up considerably. I made a couple jump turns and set off a wet slide that pulled the top layer off the rest of couloir. I wait for it to settle before straightlinging out to the major slope. The east facing snow was some of the strangest I’ve ever skied in, both soft and crunchy, grabby and super fast. My skis sunk to ankle deep or so and the snow grabbed my tails, making it almost impossible to turn. I could make large sweeping turns which were not sufficient to control my speed. I’m not sure if I didn’t fully clip into my binding, but about halfway down the slope my right ski took off on its own. It took me too long to retreive it, wallowing in the wet snow in avalanche danger area. Getting my ski back on, I made it over to Bindu’s position, “Damn, it feels like I’ve never skied before!”. I hate that feeling. The snowboarders didn’t seem to have the same problem, claiming the snow was great for carving. I’m going to attribute it to their greater surface area and not sinking into the grabby mess (and not my lack of abilities…).
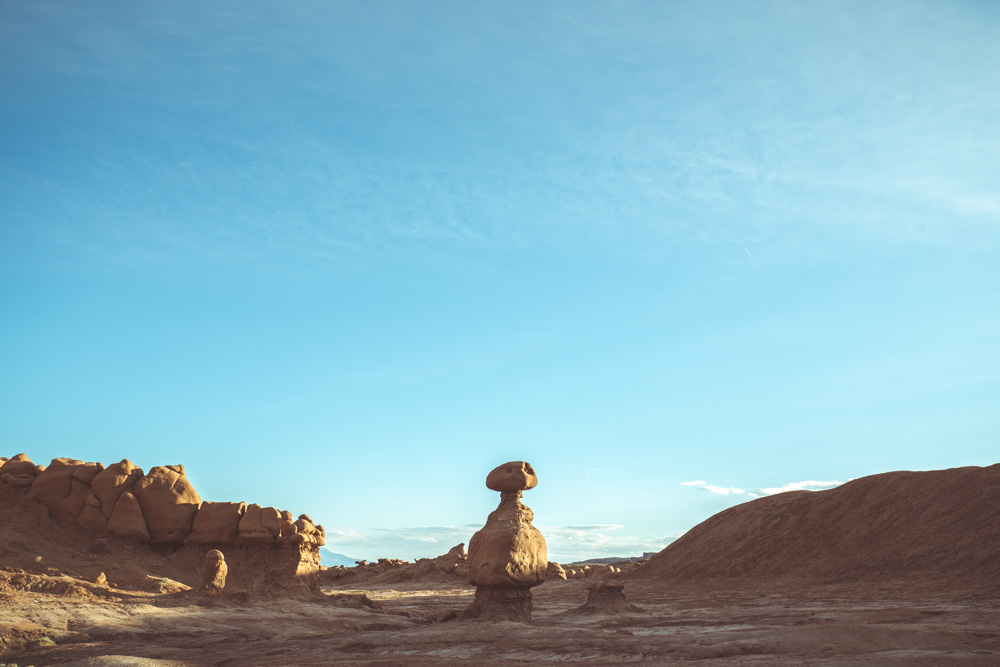
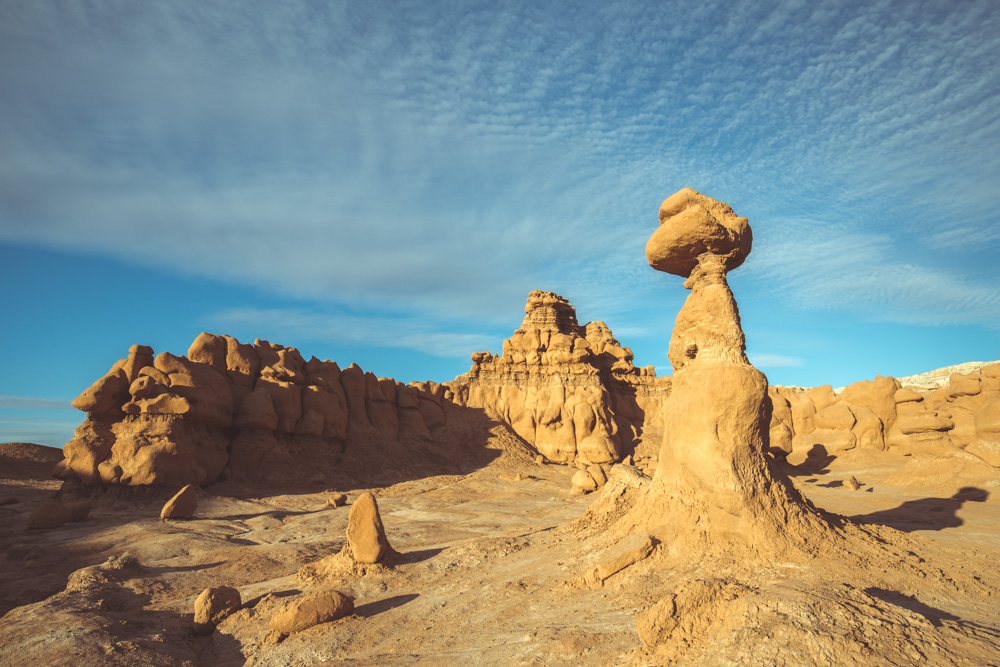
The ski out is 4 miles of generally downhill but very low angle skiing that goes by pretty quickly, except for the dirt patches you have to gingerly walk across. The last quarter mile or so we had to put the skis on the packs and awkwardly walk with ski boots (I guess the snowboarders less awkwardly walked in their more comfortable boots). High alpine adventures are fun, but I think I’m about ready to hang up my skis for the summer. It’s rock climbing and mountain biking season!


ÿ4ãÁ4ÔÀ”¥’uc&.2©!^í±8Êy=)ÐFÄ¥ª½ú×ð9hªÆªã~`O¤üKô6WÁ!Èÿ¦dHxô
”{3´väÐüLÔ
)µv%GüDcþqIr´úCXË· JüeÁ,´{¯ÚÉ/dF^if«nlõHVê?sÌT¯ºH>!÷å±Î585Ëýb;½.i’ÑÇîä¯ÂÝx?naÇŲ́LLQæãÎ5¸} äÿ2iZßãÖíäQlÈ~¸HÈ|ªP¢ÈJØOåÑ|ß{g¦±úת-|%·$¥iû%fAv±*6·cpfâ52R_õöBÅ¿$híÈîÀÖÿÿÔ êoEO±Õ[Pª5{âÉ%2üG§`ìO|º·ké Öt2µ»cWÝÊ’©u’ÿÏD|ËÖí$¡¢º×#oÒIêí(^-Cب;õ2Ùá>JmsosTZÑJïô0Þ-LHR¹Ybn/B@í±§Ë(‘
}¿³¨4¢ÝOlP¾ËO½½j¢ð}©ÛìFSemONÑÈHfSÊfÝÃ
©Çöü6WRg´Ri5ËÉa0ªÈIJ¤Ôå±Æì%2Ut©Jú·ÐÃJñ¹ùÃ#<Àl7,£ù¢à¸Á¶Ó\"nd|A6jt«¹÷ÈpJ[ÉcÉ0²òâ/¨KêöbSðbzåÀɨy§Ñ!$J©
ƹ%õÅîldKt#ÓfìV½~øJº¢Ñ:Eݽ©w<Û¦®¡ÕÕÿhRµøqµ¦-çfÛOòìWpÇb!I°a!øX½c§/ö9n!eö[ò«Ìí'1Úêð²¨ê¨*Wým²VU£è~sºjúU§YfÕ¸nUÑ£!,7bÃÅ /Þä/6ê×ì:Ñf¼4B%(¢HëUܵj½ÿÉÌn+.çUÙüq!¿ÿc/øóѱt¯ÿÕeÞym({y rÜW=e1ÉÈ·è Ô7Ù
A®ÝòvÅ
±B\"jV)FDX°A¹(MmʱjNç个9aµ}[GÒÃ`¹x·M¾,®Lâ:¬Ôÿ0<kIn`J*ÖÓ·!4ÛUü¸TxDÖ*§ÃzLGO
²¬Ñ!1{³K+½øÊ,çáfÞXQÃV(I§Ý¦&'¹¿¥}¯éú<ð[Ý[^VúÄIqo²¹NN¿ð<xåÆe»QÁi©[´ë¯b?µ¥:Õve§pF^%а_:lG×îÉLk]Òâ¿DIÞEô(QÒ¸PÆî¼½,L$·»n²°aòe#
¤X亳¿!$7w_y9Oñð4Ái;¥÷W÷Ö@
NÒXÐnÓ¢Ôoã¿êÀ$$Zm§êz4l²[ñ»hèÓ
ô0ÊæI4ððóK5?2ÜU`è#S@@ñ§êÉÃe®Y S·²U[²-íI©¶-þª÷ùà@6æYC)µ¦¥lµÒm½W¨%ì}Ù»d%.{32y&Ú]ÄêN£’.D)O:õË095Í7¶Ú¬P¬{b @k¹ëLbçÖ-`]Ô&´½hM&ÖxÖCZ}#6Ä/¶|««Á¬ùzÇPKU¿
ÁÌ9-/8óº.°ÖÃÚʲÄG ÿðÿ±ÊNÅì´|’ø©êº}ì7Ö6÷ÅqÈ&ËK63f’KÿÖå{ëÍJÎâGÔÂN๩4&µû9¯ÕÄDs4ÄmOOó;ÛÌÐú×YªµqêD3Û7d0A²ÂyjDR0êÕilæ¶v©-
O¸ÉðLr,8ây
ð&î
/õY¢*kþ²ó,¢=ª:ÏOsÍí¦â@)Ec¿RC;bsW0BF;äQ+nñ”)V’PAZÓ~¦ñ|#,K·7mÎ-¥ìS%£*WPÂHýEØø¶,UîÍÌvwðÜ£ý
åéKÄä¯#ÿËâA mǯ ev¶(
2AµÓ5³sVs=ÊPG$q·1¿ó)÷ácOJÓõM{Q±°ÓFú±B/¯XèÄ*òC!Oï7â¿ëeô¨Çk,Oò?ÔIÙ©räøûxåcûÝÆ}éeæuçö¿
ðKèÓ(ê[¹íÉNËbÇ¡û±ây
yºöÉ:¥¤
µ,+@=ðÀ©I”1Ür<ÂÂ#2Áù-Zdç*äÆÐ×z(*]· AÊãRܲ3`¡
Å¥ëR;Kk¤ w¨äOøSË$}P *Þó$wðÇi#-ä4Ò¿eTB|@ì*úF¦5ãÖß9\"ÞXIô¤#~&´(ÄtZªØc92$ò7M³21Kh#ûG¦ÿ¬±¥Z
nÂxR[fõãDÈ£j6à`JÙ.§¸sÅÙ#§ØZW§sT¢TPw$õ?×S¸ÕìlÁ7'ì
Í~]¾ Z¤zçèÄ?ezÓçý2Á$¥Öum:q,$:ïbn§ßCà´ Rh®è׶6¶y¡ÈÕ6êÛTÿº¥ÜSäyeyTijÌ}4O§}`-HRôUþ6ÌY;þÄÏÃ>ÇãéB~QëYÑgÓ]«&! _÷Ôeû1;3íý7Q1þP²ÿ×9Ó
YÙËê©,ÇâJü”
óQ9
äå`7K Ó¡F2}]Do+(¡$ï¿ßÄ%dèjÑÉä|@vù
TcÝåáê¨á±åðï½zü°¡mf©’mºï
Ük41¬6Ò¾ÑBi^ßdýùy²!eÆ¥qè»ò´· ÜñHâ+uÿ[0ó6¹Nå±²»;xä>ÌnOÃ1G7 ò@ÉåÛxÁ}:I4ñÜC’úc*éøfn1 7ÝÆ;$ɬzÅäºÅåÌmY,äviVE’ð¥cÿW˧ÒEègPÒôéM3ÑHMV+iEe¾£¿ôòq£)3/êO¨ÆZÒÚ¡ëÏBXñ¯ÀÍ¿_³µ”uY}â@ë_àr)yvµwê1v
4b?2&”Î2HînÞ%
)+AOò}²¡=Ϥ6ñrܵ¤ùVUµÒ+¤@(N´§Ó8¼,%Zî7¤
õ’·fªOZ8PÔ¯ì×qrÈD2?-yrÇ]¶É?9H±GÓ¨ek]B’ͪY ImÅݬ2YË-Ź1ËjªQÀ$m¶z|?ðÙfÁÎ>gô4Ȭ^#»Ã%µ’
ÉYT©Xùµör²@æÛU+9úõút¨&`ÀVpÂBCdN$)½¼VæÐì®Ô¨¦IwÍ¥’ÖqP£í5=±mjþ}’Àþ{±ú{e±ÆÄÍßyÎñjÞµ9h4¢_1ÞÜF ®LD02]mmªÞ¸Ê©ì:䩳¯-è×:5»_cÍZ ?îÕâOã&QæÁ|ÛlÞb¼D^
ÏêúúÃÔ¨ÿã°Æcw¢~Iù´¯3éÈJ$äØÜ·ÚÝ+ôÓ’!a”ú]¶úÖp90NiîWâüiEÎÑäàËò”^®çóeÊ_£D< #ªÞ·µ±xºN/âÇêÿ{'ÿÐßÛÜ^+ÙÛA<ªK\"KJ§Þ5ñÇr®AÊêÕa¦Î«¨iÑÅûr ßè[,8k¤Ò2÷ëß/ùjgõC»äe¯Ì5TýØuS(w$³yCGFî ¤¯\"
²ÐtBïAÐ1¨)Gä]/ý{[½JæNLe=BB²
ÌGRú£Éq²Zh³F½ÿm3ðå~ÎG&pÜÙãÃfÏ&qgmokl@A ÄæÔÑPñ4EØjf^,5¹qreè
ÚB$±Õn>gß2u¦’|r%º ü:M¤ª¢
ÇöÒ¨ßzÐåF!²RnM2í[kÙ#QöczH¢:paÿá=oÍVì°íR!ñ9{lÀPVÀx)NϦAÂÍûJ$bAc^ ×-5RóOòå½Åý¼;°0ZÅ}c°ÛöQ©¾§6NÙX»£Y&ª/®Ð àC#HGab¼?äñÃ[l³ìOEPkýJ4+s¬0è²r%>¯÷ÏÿÑ;°ÕFHà¸8¿t «UiÈÓÇ0ñìI$7ååA¾d(&7´ª×õºJhÙNç[ [{ð©¡éJd¸Xµc{~$ÓC”XZÃmTQÊ·É$Âa!ȲÏKÐîu P$ñ~É’Ù]÷§H+΢վ¢cHU¯’±/19¬
¶:öË/ÞU
׸dûC9&7{±Ë6Ý[éæÍàb«
”§åQKnLf&¥º¼¹a-2Ziwmª>ÛéÉÔvY¬]A#£°vñN&Ãl±Gëxj}áj:í¼V¡$amX±ø1$^ç|®pâÎ2á6óýg]×.¥ËNV6çfTòúË0éãz3g3Jáò®£?ï®GïV(þiá)Õ®K*%»=)¯êÀrÕÆK*Òÿ-µwoQí½1M-Ë®S-TVÁL×òþõ$Q׬PÊβ=1§)§òÍ?@r³¬=1§ìÓÈhhµqüÄéLÕMW ycNÒ$õã,×,¼É$S© ú2¹å¹¤@O,¸ü»Ñu¯6ë6wï,Mѹc`Ã)¯§³/Í4åeçO(h~P¹Ñá0Ù»ÐBOïD!ÓíoÓ]xªCfOÿ8õ¬¯+M`íW³&¿Ç-Ê¢üÊòKɯ}bÊ$O®37Jº®?â-þË1¥µìnÐ
HïÓÿÿÿÿÒæ~eó^ üËòEÈÉØ÷®W
Y&í<û«F[ÙGzz¸î`
,ù÷̱úsyA!!KÇ ïRÊ߯Se5Ñ¿1µ{ËÁ§.'r@R]ùq#!0», ,òzéYÀòÍ\"zî9]O°P~#ü
ÌLȹqê¾Y_ªAxñÂFb,¯¿ìA©þÇ2±aw§&A-eæ
:òÚ¶Z´µ!Ògô[nW
ïË8È;t*ÓÞ]fô¡7u·dîÇ* R;Û»X¥â$ÿvêÊ~[°ÈEë^M¸vT)hX2©¹Ç¤²Í_Í.;ë2ýÒï¿°ÀbñÌÌmQQ,ì2Ë·¦ÔaJR£sòÇÃe<dl>aÔeiâç_VS]¨6ïì2áÕ§ôe]ü³óᔶ»ªI¥À@snÒq¡ïé©úù 9B$ózG¼äý*QÃ&¡p}wÁ5¥GS,ý°còeSA<QÖÎlãEz¨ ¥:oÖh6xt,¬ý¨c¹v&NÈ
oÊeÑµÓ ¶(v¥©ür³ea~Ñä~ìi½q¯§ðÒ¬NÛSß
\"Ó(t× ²
lõÉRUPmÄ ;tÆÛÉÿ1¯æòþ¿¨ê¶È÷:súRoA\"!+ôÕ3+û5åäðmõQ.5·ÅÛ
r5c·LÍr-ë_óסæI ýÕìjÀ{Óúå¡Íí^}ñô¸¦´@e·2@ e+MúÕæ9w=8KüyÿÓá£V¹¡äìk±©pÐ[këÊ~Ò)ù¨?¯
m0¶óf§o!JB¤öÿ QxSÄèÞ{ÚîKÛÈDrQLñª©â)â~g(ÉËm`ÿÿK[µWÁÇï$àïìH
ðû~Ö8°pîy£&^-6_+ÁÌÏiq;8â¤Î£Ó÷Z!åòeË͵×nÌc²ø-cb`SA'òøI÷¦TåAßaÓþ Ï°ðz¼m£é¢Î/N(RiÍ)?¶ÏJ?d}Æ øbC¦XDò’«9PI
Iµ:e!-&*ªÑ@;2B¼-_¿4¤Z.9ímí-£-ôÈÚÔò#®õ®E¦[ÂÛýª>/L
8Ò¢U©î7è}òT^=CÔô×õaC|+±$ü
?®ky§Óષ^ù×g£%ü³ÕOór Äß*ÔeüÃQæúóYëZ-Èr-1âTs_Äf)rôáËæÿÿÔçcò~£Éù®Rñ¤4ogrNÜiJÙÒjMh })?¢ðÊ ã¸ê=ò> O_ɽTn·6n+Jz!ÿL> GB]~Ny°Ç¨M
ÌuÿãÄá)mÇåo¢4ý;xzf9kÿÇG
Y?<Ãn {;©0ÉAô°´Ée !¾;5Tþ#(H.È£Æ]{ôlUëv5Ý7L¶Im#ÃÆEYÀ£!V£|ËMÛ9üü¼Ö-ãó4PÙÎÄÚÞ]wD%yÇn
Ä©ð´Ï7übÉ Ð÷½«Gü·ò¾,WÀÚìÝ_1Ú(è!ÆÓ6Ê)M*ó¯ÍËpçL5+ëú°òÌ
H½|¾]E³6k§^z@Û4Ò¼9±1¥GC±«Ç(
Þ+`°1D!x¶æ!KÓùýòg%°bR×HÑídkm£2nóÎBA'v5=òd³¥º.»®·Mm/Õg{gçMÙ;íØà\"I³C9^ª§µr!idBÖYìuíL%[ÇM
p¡ Ç
OAL*)Oᣢ¥HmQq,`nÿvZD+ §ZlH;~XÓ»òñt¯¶*ùâËÖ¸¼Q°äâG-¿Ø±SiÍI¯.áòl×ÌZ¥h#¹½¹æ¿fxq:ÀnHÜ$ ôËâÕ'ÛY»¾^Óî+Q$ _ q?«(ÝÿÕ2Ù®ü²*<§ÂÂ(\"Xá(¢þ:räA ÖØ°o`ßp3èÚ|¨x¼wªxsU¯ü¹27Øéï'OÇÒÂ~ÜèFþs['8#LÖnfOeþ=2#O,
éÁðð;åCU©ZÐEÃTZÒtõ·YÒ[VVy0³·F$n~`%JsmdA©¥{Tý渰%Y±ÃKjé¯ALU^7ZôÛÃWk£ÐHÕ§ÄÜGê87]ͨ¶ò×À'&üM?V+a0?|4FA=p¢U\"pM=¿ÂØà¤h$!7 ¾ü*¥µôWPÇ2$UAuñ Æõ8MÆ2HY£äPïF_ö#%Ôó§æ%»y¢æHlþ[Ø\"¸x,UNë×ØÉÅÏ x¯åXÖÑé(8ø»a0úçòvÿë~D±©«CXÏÐþ9tEÿÖù#ÌߣüÁ`uHþ¿a{0úürWÔ(X*º¸âC¨ÂbÆßRë¿vUÞ§{jðÙÚBóÍ\"K-B\"ò$F§m²4øæçÌ÷2kWsEy\"éñÌÒ[G K,|øƲpØ7¹ùK¦é:}Χy¯[HÌ·Oª;ìÕö}¬ ñ?¬$¾t³I¬Á”9Dlã³p$ñÿTáàeik:n5¦Gw¤q
ËJÆ>ä7¤Ú;È^}zòÖæîÒ;MBô[·2q
bê(kÛýHØ@Ðw-o£ZÙðw/VTnVQÊ9a4VTÇ
TW©ÂÀ2 bhh;÷Û¶4Y$0ð! ö©Å%ó¿æ¤h5;äñÄk[£ÌmÉGõû’6″V-ƪ4òÕú¬z¤b%³IMê]ÚæéoùÇkÿ[ËwVÄÔà |ëýåD_ÿ×gå·å.ªë:]Þ¥®Ù$KWcO@n
#é¸4àÌÁàÉÀÓz¥äqÇÇÒ+×åíNTI!kkC%»ÍÈ#Ãnj¤·%èéþNWÄb’lMÓ4Í:?NÊÚpÀhP¹Ø¨;åí¥úÆ·
ØÛO? ±’ ‘oÃlÂ@_7~kÑê¾EHµskw%ż
ÉX=HêÀ#¡âÿìpÚ”7æùÎÛLÔZqvåÞ¼AY”â~àS’mRiôo-mYÚädpÄ ¬Ã«uÊüXÊÀèÆ2è@Ö¦Sò¾½”:µÔO@IÿJ`£a·=þÖrX
Þkæcåï.Ëp´£ë
n4ã5|Gódg*.L!qø¢´ßÌKUòûjQè²Î/¤Óú`íÇÔÈxLxâ×|ñu,k eÁi×z3ÑkOò0x§!|ù©Ü6£ÌòÆ5+p¸© ̸@¨wÿ’/Ùæ¤5
ÇÀ)ÙÜÈòl[±gød)ªýYÝx»U{[®iUP”((;üöÇ¥”·´vSâ’îÆÐ{§FEl?
¢ ïÒ:4R£§¾*ÓE Ó++) NêãmÝ»Ã
)¿QÅvN«Xó9Ý6ÈGÍâv
-vF_Fõ$ xÜFWzvåØMÁ¢b¤ñ+¹&Y¡-0ôÕÁX^´ÌSñÿ8ßyÆ÷R³’f^j>DdòrkÿÐã÷.ëy-H.®AeéPi±É1zßåæ}ÞåÝBM¤Ô”´hElàºú¤PÏ_xòÌ|ئ¹Åé¶ßZÓµÍ6ÇRºôf¿dUD.#%SÕeØTm`Ç”lò
`=!õM(ÃýzÜ*Xú©ÑwñöÌ»eÄó1~{èIä
SÌZ2j)ptí>fPVPªMc}Oø6[8_/Üß_ßÜI{
GârÙòkÿÑäQNU.wöÉ1GØAÃÔrÄÒõá
BâÔ_T7Ïq*L+$l¶Ô_õiAoͪ
Rs¨yÏS&8ÖäC<aır v¨Z
¡ø~ðGc·½Æ¢mVÚØÕS·\" 1üRß[«vPaTÇËúõp8Dþ»øp[þ2¬ÇÒSlÌ34¾pFKúöG%Dýç©O$×Rº}µÚ<QÇqq<qH
ÈÊKPûË2Þ«?YÒ4ø*Ϫ_1cÒ²±ýYFad;Ð÷¾g~JQþ²c·¨dp;ÈßÌ1r¤W§Ùëôy«Å<Ó34VàìZð0ú'e¥d1\"´JI£R;ï¾adæÝKýñÊÛ¬B£UCmñJ\";s°®DGoLU¸Â¨
_ÃDGnùU¥*GÅ°®ý±Ue|0±%UbN S`Jª¨ðÂÄáF,m²«NáE!ØW
CóíwZ?êDM;K/ë¦_§;ÒÌlù7^újHÜþyeß·¾t+@Åý$á_ÿÒå
õɱU3F¶7<Ø|d!¡¡ðÄ*HPÒ¤ÈÐtëCO§¯û·ëe7§q´e)q+ÇÄoÕ¾\"ÝI5Âwk máä¹ËR ÔøùØi
zâ¯nüü[Ó&×uù¦Óì/#k]1bâ²Ëë æàâJ®ßú¹ O%Ï?'Ëä-^ÓVÓY,®¢iä£2Mb6V ýÚ_ù·%R%¸kþqìÞßùòÏPº/,<SQ²Ö§·ÁL9ÁëJFÞPÑgañË=ì«CC#ÿ
+Or }ß÷ÌëÊC´±Ó»þ×Åà|rj<Ñ:Ó2éW$âØ=©Õâú÷Â$FS+rÜ!4úå©&*=n'UÇ¢^!·E*(ÌläNÍ°tÅ®c<®ª¸ó$[+râz»ë2r;ª5ðÈæbAZÞîÖguYØÑ
AðȦÓKPQ«ô
ErÆj»þREoÞáUäÜQ&ÝÏá°¯_
øoÞþ¼§e_[QQÛܯêÁeh/[ËÅêWéþñá
éyvwâ¤ûýrEU4û#ñ®<HðÂá{0êûÆ<Hðzõ¾nèióÃÄÄâhßÆÑ=Hx×Â)O.m*_
B²
ÿÀÃ-Ã:YÃÒ_+yÆ¡yoJgGË#ðÌÑÍÇ%o Ü}wIvqO ÉAÿÓãFç{dØ¡õ/¬¶¢G$^©1©pEI;FÆ}U*¯l©¤edn,²ÊB
?J²U£t©R´4ðãBò¶úÍÌ°ÝÁÑÉ-©VYUíûtã$2¾ÙÒOÕ,,o¯£éÖðµ¤@ã°_a°È«üäò|~kü¼ÕtàîáÝXâxe§úã²Â
ü/îîÌÚ[¬I\"¨Uc/Jüñ&ÊH_.¯µ.ZÙ¬ 6±O5Ñ¡F¶xWâY%iB÷Údf7¶øÈpWyf8×ôÍÎñuI.cô :mÕ @Ï\"ÆQ}øy|%O³k<ÙV½]&à´ëüÃß#ÃH7ÄG§ÄòT{q˽îOæîùjè¯ÕµkV²O’è®DÀ¨ÈÅõyEcON,õcÂ6þª@¹ä¤þì¸ï44ªòÛÖYmê@u+C^â, 32|Ûù¤5½Ü÷Õ¯¯(Ye¸
ëþQSõ8½¿’)}bGXåÛäXÈhÿÔãÚÓßCV:g¢¯ñªÄ
åOwkÝKKøçARIHÔLÐÓ~,JÌV~¯m¨ÚXÄn´ôh}6mÇ” oÙ=2$*Yë>±«M”¶7Ò³2ªÑ±-°)
Q6Ö÷z4Ñ}qfA-¬±ÕÊô 502ùOmëz¬ÚµÖ¡=Å*É1ܸJòéör 3%ô×nfZû¨ÖƤ÷T@”pqCÉô-CËÞTÒ|Õ¢ÜßAغ¸ÖÔ·ïÕP|_u¦ $§ÿ6×VZ@³½ek··
ÖVTìxÂy¤e«kv/ç+C°*ê¡IC0BÝS?ÕÅyª#Ii$b&`GÁ¯BFFqæ{ÆímÄ
ÇÌßáb(!·}ñ°lëvfûÉR^¼”C/§ e4õg74*½°ºLÞÒÅ&vkaé[Õæg¯ S¹þb0ȱSå]rÂïÍ+
ï$Ââ_]hae@¨¡:tø³Qôa¼GJô³I,Ðß*ʨÌÅ
E?<³ÐßY_n²z ®9-AùeÔ¶´HÔ¿ÛÞ÷ñ:àJ¥¾¤Í4 qiË*q#;ÕiÒ¸ª-ôy``
G¤ª¡?
hI$ü²$b-\"$i*-ȼTZ##Ô3|4ÛçÇHÕ2ÉÄ]¡§ò¬FÓ#~B=55û²öòÿ@/It¾Wãuïî¼[oùk¡Ìñn.í¹çIàbz¨?dãex½ÏåëòAæ é©ïz'%õîÌ~*ïö²~IðüØåßåö¹m%¨æÒñ-¡FVr sÿdr@ßF&w\"¼ç=?T{¹txîmYiõ8.Þ+CÉXUÃa2îTѵ/;h\"æMKMÖ¦pü¬}hPoE)øק&ÿ
ÂcÜ ÎÙ_54ØéW^aµÖåÂcê)ûÔàμ÷O")